What is RAW? Post-production of amazing pictures relies on it!


“What is RAW? I believe that people who are in the industry of retouching photos are really familiar with it. This article will be using Tony Northrup’s tutorial, to let everyone more understand why RAW is so useful during the post production~ “


We always heard that shooting in RAW is better, where more details can be recorded, and the range of post-production is also wider. But how big is the difference between RAW and JPG? From Tony Northrup’s tutorial, it has shown that the difference between both, which is worth as a reference!


As a conclusion for the tutorial, the pros or RAW are:

Larger motion range (01:20) (03:05) (04:05) (04:58) (06:05) (07:35)

Raw files have a larger motion range, there under the circumference of big difference of light source, the details under brighter and dimmer environment can be more recorded. Therefore using some techniques in post-production, the details under overexposed and underexposed can be shown.

White balance is adjustable freely (02.15)

If you are using JPEG format to shoot, the white balance is determined by the camera, which is difficult to retouch at the post-production session, and even it is retouched there might be damage to the image quality. In comparison, using RAW format to shoot, the white balance can be freely adjusted during the post-production without damaging the quality if the image.

There is also stated the cons of using RAW format, that is the file size is relatively large. and the most significant cons is during time-lapse shooting. The normal RAW file usually takes more than 10MB. If you are using the RAW format as time-lapse picture format, you would not able to shoot too much, due to the disability of camera to process such a number of the RAW file at the same time. Therefore at this time, JPEG format shooting might be a better choice.

Besides that, I believe that everyone noticed that the RAW file is highly relatable with post-production. if your photography habits do not often require a lot of post-production, shooting files is less, then storing and sharing JPEG might be more convenient and a better choice.

via Petapixel


Follow 我们的Page,每天追踪科技新闻!

想看更多英文版文章吗? 点我进去~

How simple is it to edit colours? Let a girl’s dreamy palette tell you


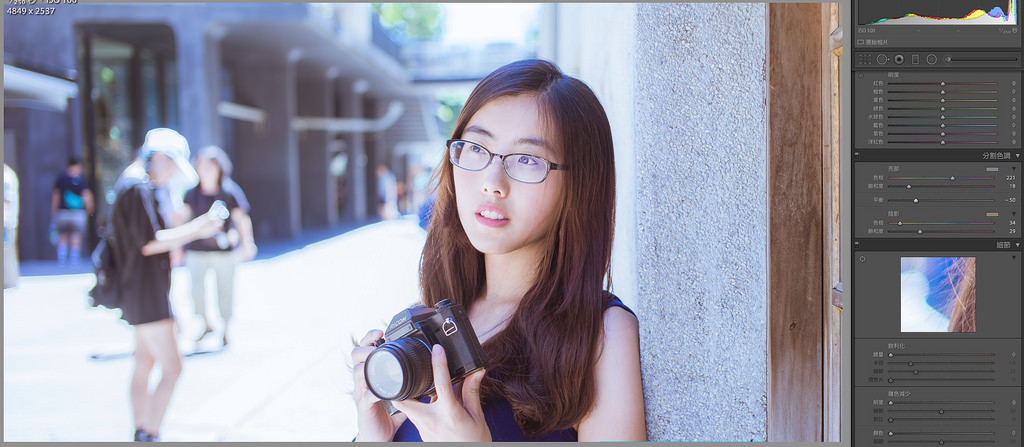
“Sometimes when you see beautiful pictures online or in magazines, you must feel that its effect is only achieved through a complex series of edits. But actually, editing ain’t so hard, by simply tweaking the tint of a photo, you can completely change its style. This article is here to teach you how to quickly find your own dreamy look palette.”


What will be shared today are tips to adjust the tint of a photo in one click! Most wedding photos with the dreamy edit are done using this method.

Aside from this, the dreamy tint you see in some short films, MVs or commercials that look unrealistic yet beautiful… are more or less all edited through adjusting the tint.

A photo like this, if shot using a phone, can be edited with these effects using built-in filters. But if you don’t like the options given by the filters, and want to find your own style, then as long as you understand tone splitting, you will be able to perform magic on your own photos!


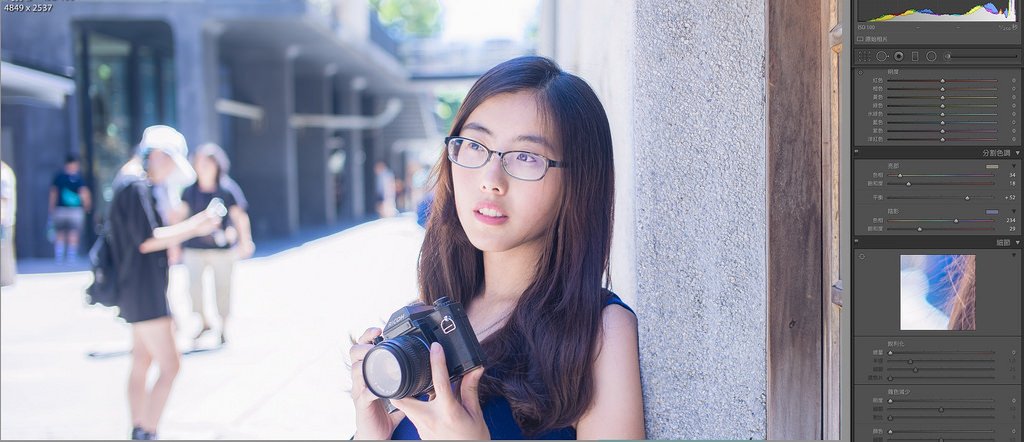
The above is a portrait I shot, when unedited, the colours just look natural and light, without any special style or atmosphere. After loading the photo in Lightroom, find “split toning” in the right-hand column, adjust the values, and observe the magic!


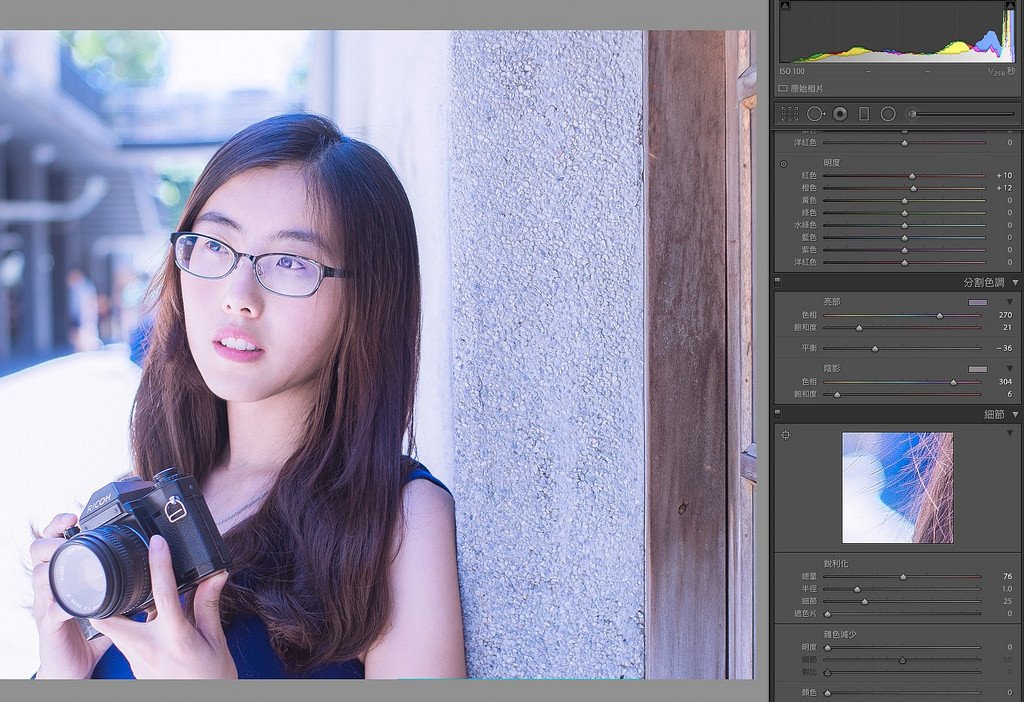
Split toning is divided into highlights and shadows, affecting the brighter and darker bits of the photos respectively. And according to your commands, it will change the tint!

The above image is the result of adding yellow to the brighter areas, and blue to the darker areas. Since the skin is one of the darker areas of the photo, while the ground and the sky are brighter ones, the skin appears bluer in the result.

The image below is the opposite of that effect, by adding a layer of yellow onto the darker parts and the skin, while adding a layer of blue onto the buildings in the back. The result is that the face retains a very flesh-like colour, while the background becomes layered with a blue tint.


You can adjust the saturation and hue to decide the overall tint of the photo. Let’s zoom in on the photo and showcase a few examples!


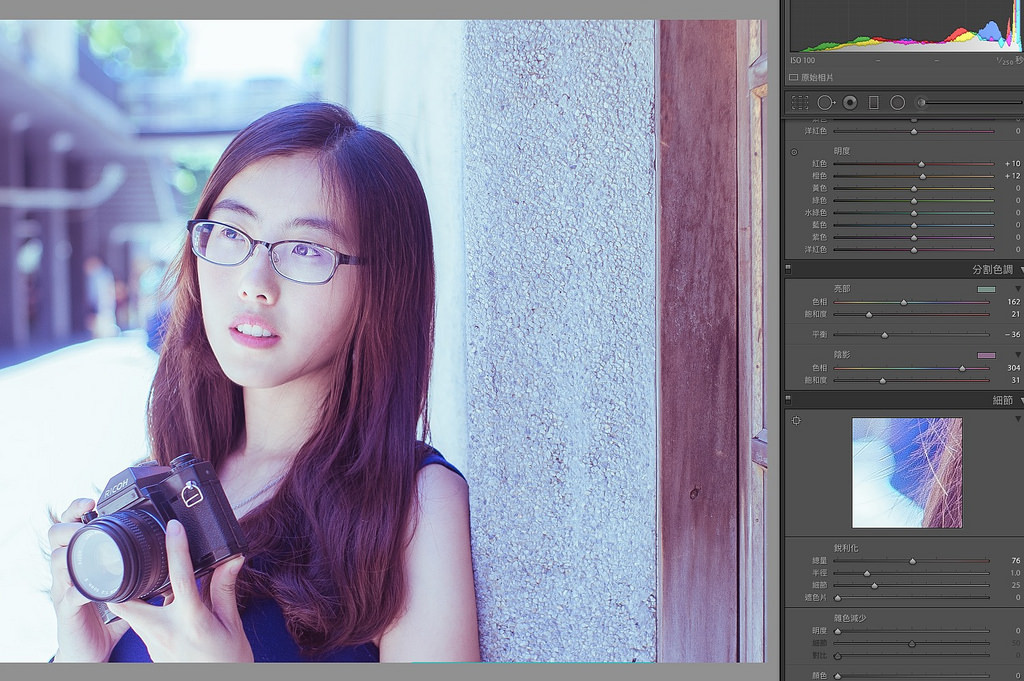
People who enjoy being a little romantic but not too extra can add a layer of blue on the highlights, and a layer of purple on the shadows. The scene will retain a light feeling, but with a soft, pink hue. A simple adjustment for you to get a romantic atmosphere, effective and subtle. 


But if you’re not just interested in being a bit romantic, but instead can’t help but be very extra… then go ahead and drag “saturation” to the right!

The colour will become more saturated when you do this, therefore heavily imbuing the photo with a strong, atmospheric look. This is something very suitable for wedding or dating photos, as it can give off a sweet and loving vibe. 


If you’re the more logical type, and like photos with colder colours, but not “too cold”, then adding a bit of green onto your photo can completely change the tone to a “contemplative” one.

This method of editing is very simple and fast, but once you’ve mastered it, you will be able to handle everything from the feel of the on-location weather to detailed, heartfelt emotions.


Basic colour adjustments are incredibly simple, right? I will never lie to you, editing dreamy photos is not difficult at all.


If you are interested in our articles, you can also LIKE our page:)

Want to see more related articles? CLICK ME to enter the Chinese version website.

Follow me step by step to become a fascinating transformation photo master!


“Do you often find yourself shooting pictures that are either too bright or too dark? Or that even after doing research online on different shooting techniques, you still find that your photos never come out as impactful as you want it to be? Through editing, you will be able to achieve deeds as small as correcting the brightness of an image, or something as big as completely altering an image’s style. Although some photographers insist on retaining the original look and feel of a photo, image post-processing is actually something of great enjoyment value and also requires a lot of skill. This article will lead you to step by step through easy and useful tricks that you can apply to image editing.”


What I’ll be showing you today is the easiest and most basic example of image editing. In the future, I will also be using examples to demonstrate different shooting techniques and editing methods, and I hope that everyone will be able to learn something to apply to their own photos!

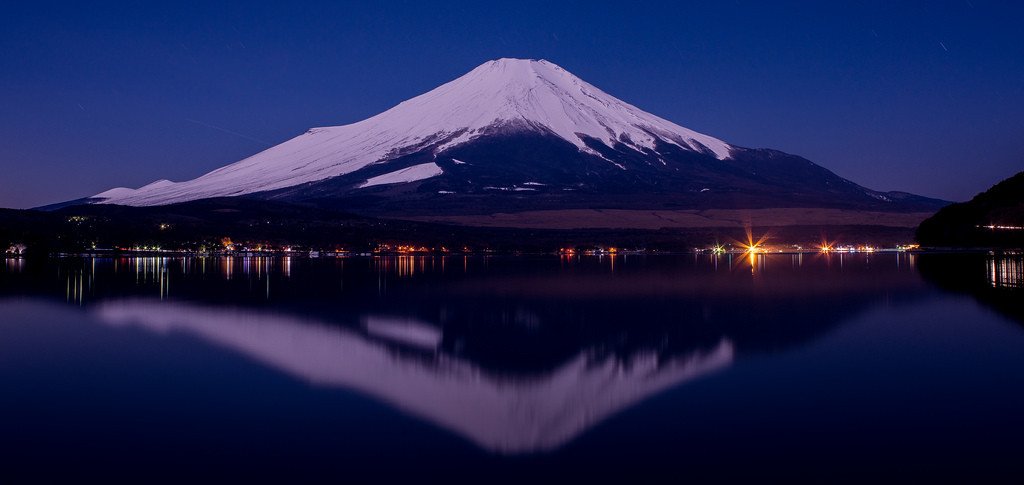
This photo is the result of me standing in the cold, at night, beside a mountain lake shooting with a tripod and a shutter release. It is a long exposure photo with an exposure time of 104 seconds.


However, the wind that night was actually quite strong, therefore in order to prevent the waves on the lake from destroying the reflection of Mt. Fuji, the exposure time could not be extended anymore in order to get a photo with adequate exposure. Therefore the actual RAW file of what I shot actually looks like this, as shown below:


You must be thinking: That is way too big of a difference! Indeed, as I have mentioned in another photography lesson a while back, if you shoot in the RAW format with a DSLR, you get the maximum amount of editing potential afterwards. Even though the above picture was exposed for 104 seconds, it is still impossible to get a shot of the lightless Fuji mountain that is “bright enough” under ISO100. Even the colour contrast looks rather flat and two dimensional without any processing. In the following section, I will be editing this photo following the steps that I usually take, with the final result being the cover photo you just saw.


1. Adjust the exposure


Before editing begins, I always make sure I adjust the exposure of the image so the brightness reaches a level where it is “clearly visible to the naked eye”. Because whether it is the contrast or colour that you are adjusting, we won’t be able to assess clearly what we are editing when the photo is not bright enough. Therefore making sure that the photo is made to be “bright enough” is a must.

Generally speaking, I will make the photo just a little bit brighter than the brightness that “looks bright enough” (usually it’s around +0.5~1EV), this is because when we’re going to adjust the contrast, highlights or shadows later it’ll usually make the photo a bit darker. So I what I usually do is to adjust the photo so that it is slightly overexposed, to begin with, this way, I won’t have to come back and re-adjust it later.


2. Adjust contrast, highlights & shadows, clarity, vibrancy


After adjusting the exposure, you will find that the photo will become flat and dull, this is because Lightroom increases a photo’s overall brightness evenly, which makes the already two dimensional photo look “even flatter”, this problem can be corrected by adjusting the values in the red box indicated in the above image.

First let us adjust the levels of the highlights and shadows, generally speaking, I start by dragging it towards negative values. However every picture will have a different combination of values, so refer to your own work when trying this out. The image will look more layered and three dimensional after adjusting the highlights and shadows, but this is not enough!


RAW files only record the data of an image and do not apply any additional edits to it, the colours of these files are therefore generally duller and less sharp. This is where we will be using the clarity, vibrancy and saturation tool to enhance a photo’s vibrancy and sharpness. Here it is also recommended to tweak the values of these three settings based on your own photo. For portraits, I generally think that a clarity of +5 is enough and can prevent the human face from looking too rigid, but anything other than portraits I’d adjust the setting to at least +20. Beware, however, if you increase the clarity by too much the contrast will also become too high, so adjust the values accordingly and don’t set extreme values. As for the vibrancy and saturation, try it out yourself and adjust according to your colouring needs!


3. Crop the photo, correct the horizon
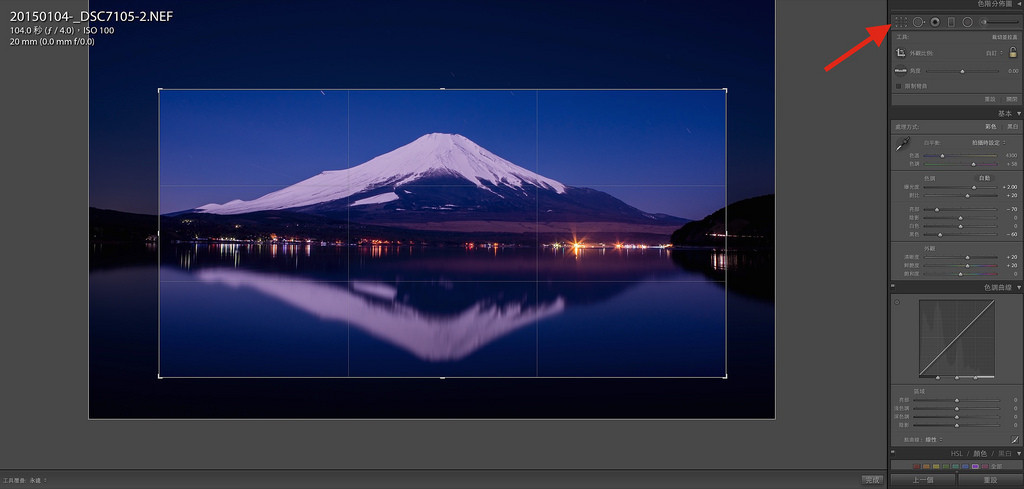
 

As there used to be a certain set of ratios when printing photos in the past, we will usually shrink or zoom our photos to specific sizes (such as 4X6, 5X7). But since we all look at pictures on computers or phones now, if you think your picture would look better if it is “long and thin” then go ahead and crop it the way you like! It is your work, don’t mind so much what other people think, the most important thing is that you like it!

As for this photo, since it was shot from the beginning with a 20mm ultra wide angle lens. A large portion of the frame will be occupied by the sky and ground with a lot of random noise in it, I am therefore only interested in keeping the part with the mountain and its reflection. So I crop the photo until it has a flatter ratio, and not only does it look good, it also makes it suitable for printing longer posters.
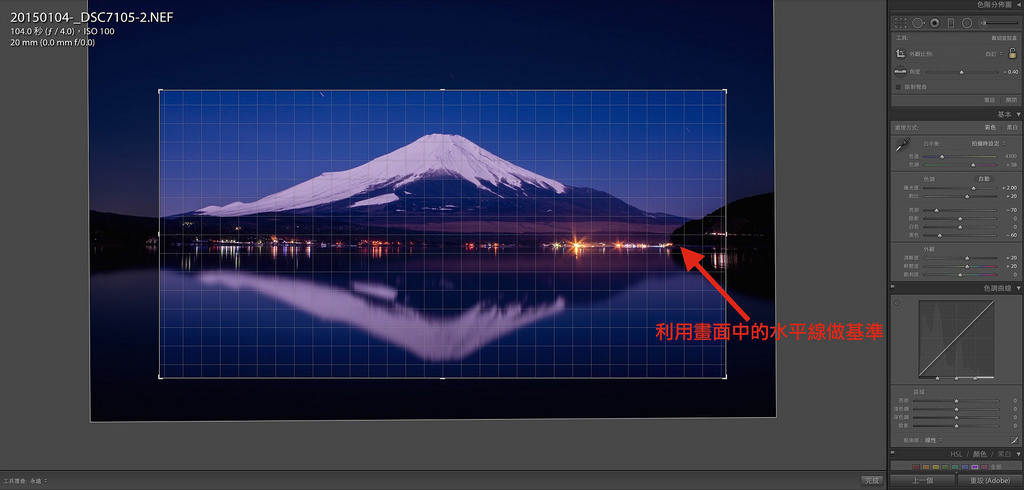
 

You must remember to correct the horizon!

You must remember to correct the horizon!

You must remember to correct the horizon!

Important things should be repeated three times. You might not have captured a perfect horizon while shooting with your hands or with a tripod, and that is not so much of an issue. The problem is that many people don’t even bother to correct the horizon afterwards when they shoot scenery photos, and this really does make people uncomfortable!! I, therefore, make sure to correct the horizon of every photo I take to prevent “making myself uncomfortable”. It is easy to correct the horizon as well, just move the cursor to the corner where it turns into a rotation tool when you’re using the cropping tool. While you’re rotating the image guidelines will appear for your reference, and all you have to do is adjust the photo so the horizontal and vertical items in the shot are matched up with the guidelines.

The example above uses the lake as the reference point for adjustment, making it very easy to correct the horizon.


4. Use the gradient filter to make adjustments, emphasise the photo’s theme
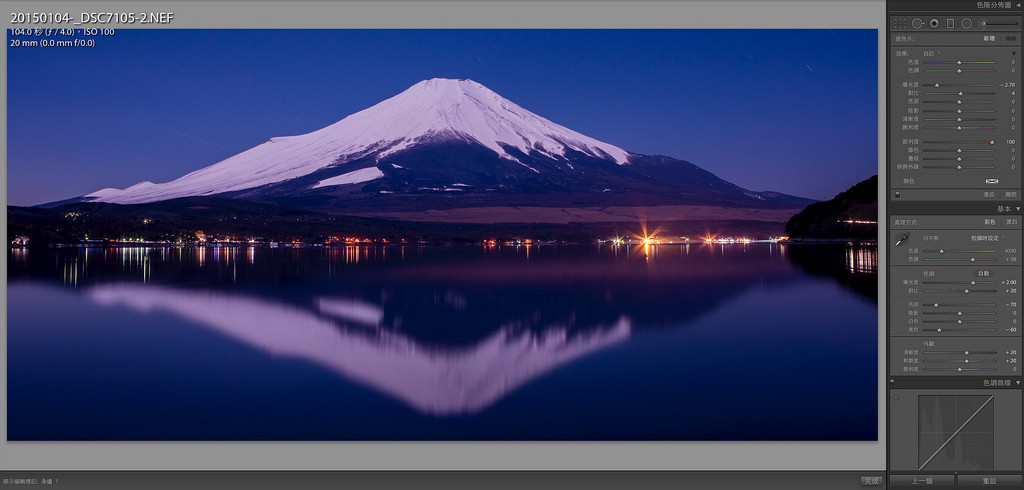
As this photo was taken during a full moon, the Fuji mountain itself and its reflection are of a similar brightness. But since our theme today is the mountain, its reflection is really only there to serve as a contrast. If the reflection is too bright it will make the mountain stand out less, therefore we must make slight adjustments to the reflection in order to emphasise our main theme.


And we’ll be using the gradient filter to adjust the brightness of the reflection! I drag the filter from bottom to top, and slightly lower the brightness of the reflection of the mountain so that there is a larger contrast between the mountain and its reflection, pushing the main subject Mt. Fuji to the front. Furthermore, due to a part of the reflection being blurry, we can also use the gradient filter to increase the clarity of the reflection (clarity +100), this way the shape of the reflection can be emphasised.

As for why we should use the gradient filter to decrease the brightness of the reflection and not increase the brightness of the mountain? This is because if you overly rely on Lightroom’s brightness tool to increase the brightness of a photo, it pretty much does the same thing as when you increase the ISO value in the beginning. Both results in a lot of noise on the photo, decreasing its overall quality and appeal. Therefore I usually directly use the gradient filter to decrease the brightness and increase contrast after determining the photo’s overall brightness, this is more or less a compensation that is made to prevent noise.


5. Adjust sharpness, make Mt. Fuji look more clear
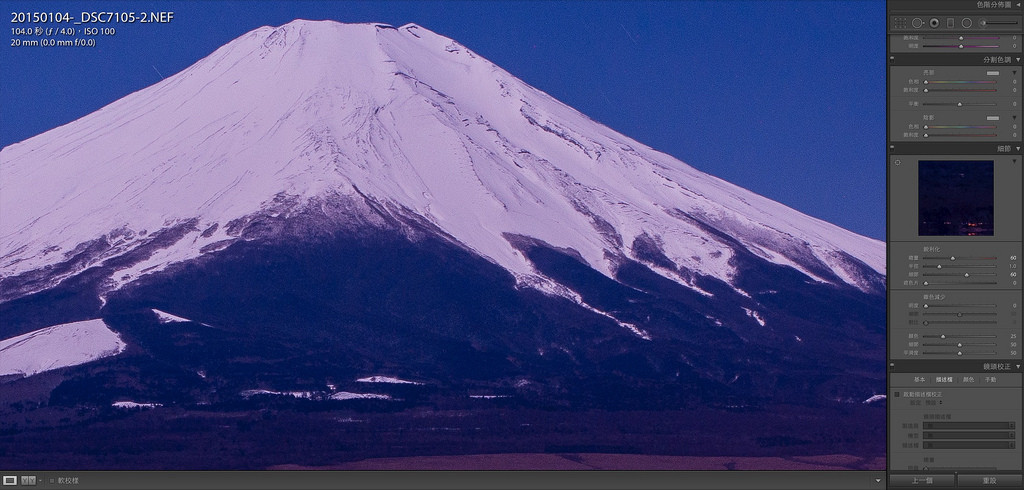


After adjusting the light and shadows, we can go ahead and work on making the photo more sharp and clear! Since RAW files don’t get sharpened automatically by the camera, the resulting photos usually look a little more blurry. In this case, we can use the “detail” panel below and edit the photo so it becomes sharper, this way your photo will be able to look like a poster or scenery shots in magazines! This step is very important, as it is the vital step in determining whether your photo is “sharp” and processed properly. However when you try to adjust this setting from the start you could easily misjudge the value of the sharpness due to issues with highlights and shadows, I therefore usually save this step for last.


6. Adjust the hue, colour temperature and make corrections to specific colours
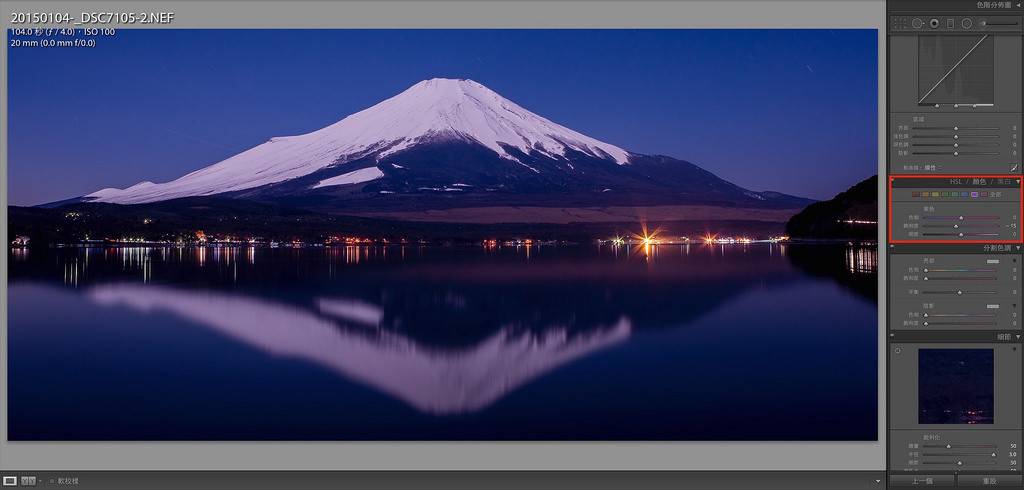
 

Generally speaking after making a bunch of adjustments to a photo, its colour will start straying towards a “weird” direction. For instance, this photo after going through the above-demonstrated adjustments, it went from being a “blue” photo (Mt. Fuji at night is blue) to be a purplish redone. This is when we will be using hue, colour temperature and local colour correction to correct the colour of an image. Or else you’ll be left with having to upload a purplish-red image of the Mt. Fuji with a caption saying that it is shot during the night. Although it is not wrong, this would be considered more of an artistic rendering rather than a realistic one. So adjust the values according to your personal preferences!


Now we’re all done!
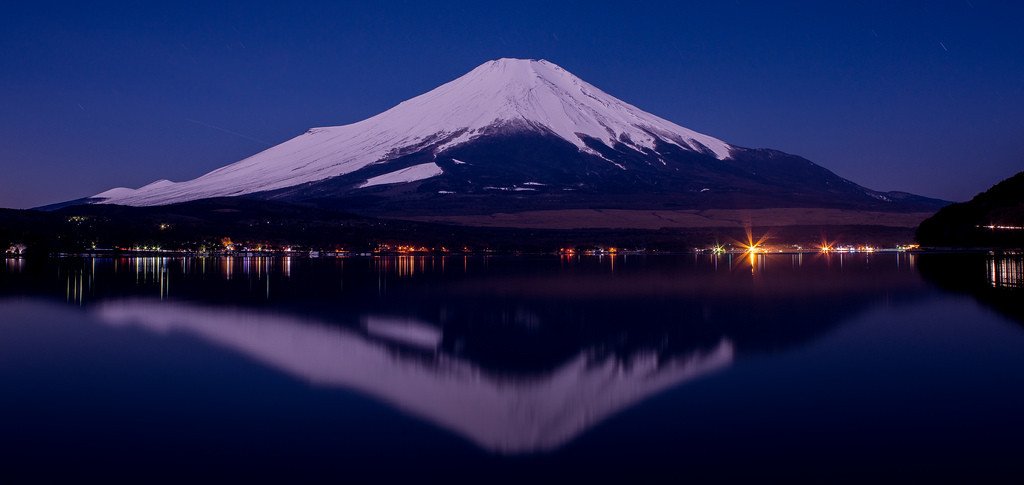
This concludes the post-processing work of this image of Mt. Fuji at night. Don’t you think when compared to the original version this newly edited one looks a lot more dreamy? I know that many people think “editing” strips away the merits of photography, and I will ask them this: do you still call it photography then, if you use a specific brand of camera to capture a specific soft skin tone on people?

We can easily capture images with colours catered to our needs by selecting specific camera brands and utilising the characteristics of its lenses. Although during the age of film back then we could also select films and particular lenses in order to obtain a “specific” colour performance, speaking of post-processing, layering and such still would require you to rely on darkroom editing. Back then, we don’t have cameras that directly produce JPGs (aside from polaroids). Therefore personally, I always shoot in RAW when I take pictures, whether it is for travelling or self-portraits. I do use both Nikon and Sony cameras at the same time after all, so if I rely only on the cameras to do the work, then not only will the resulting colours on my photos not fit my need, there might also be visible differences between results from the different cameras. Why then would I rely on the cameras themselves to render my images?

If after you’ve read this article you still don’t catch the differences between each step of my edit demo, then there may be two possibilities: One is that your monitor is of low quality can can’t distinguish between detailed colour differences; the second is that you may be less sensitive to colours yourself, something which can be improved through training.

If you are interested in our articles, you can also LIKE our page:)

Want to see more related articles? CLICK ME to enter the Chinese version website
Try this to make your camera pan and dolly without any professional equipment!


“Technology nowadays has made our life become more and more useful, the film that made by cellphones is getting more and more professional. Try this film making DIY tools to make your film making more convenience!”


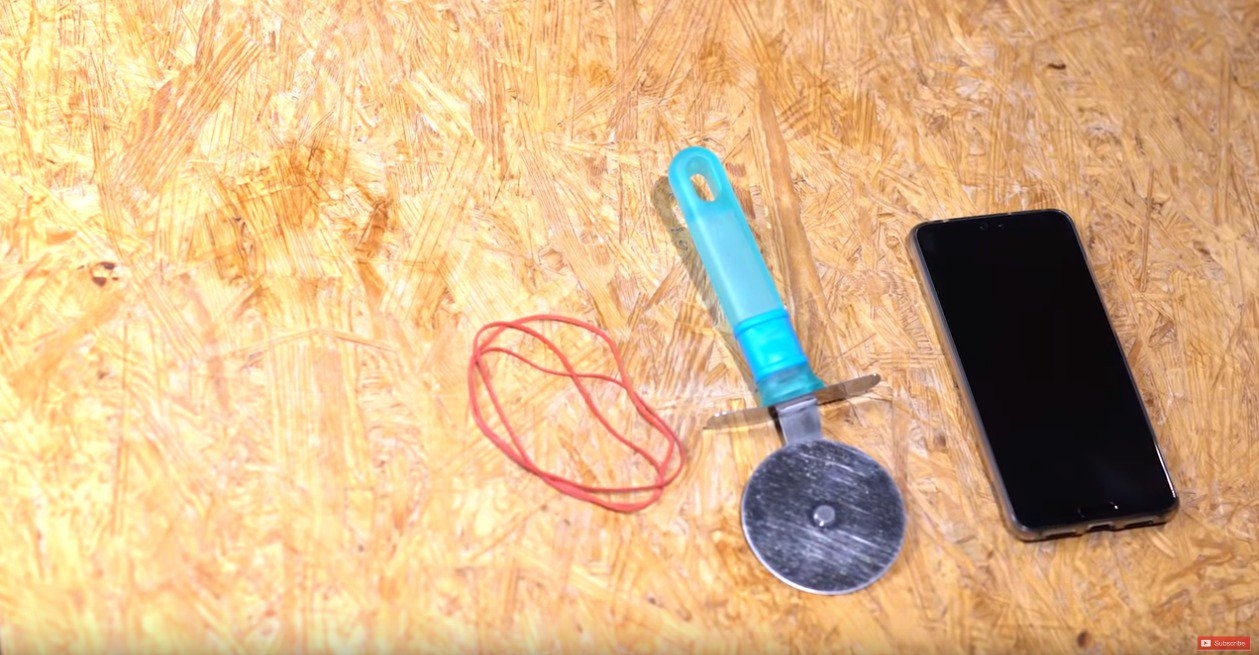
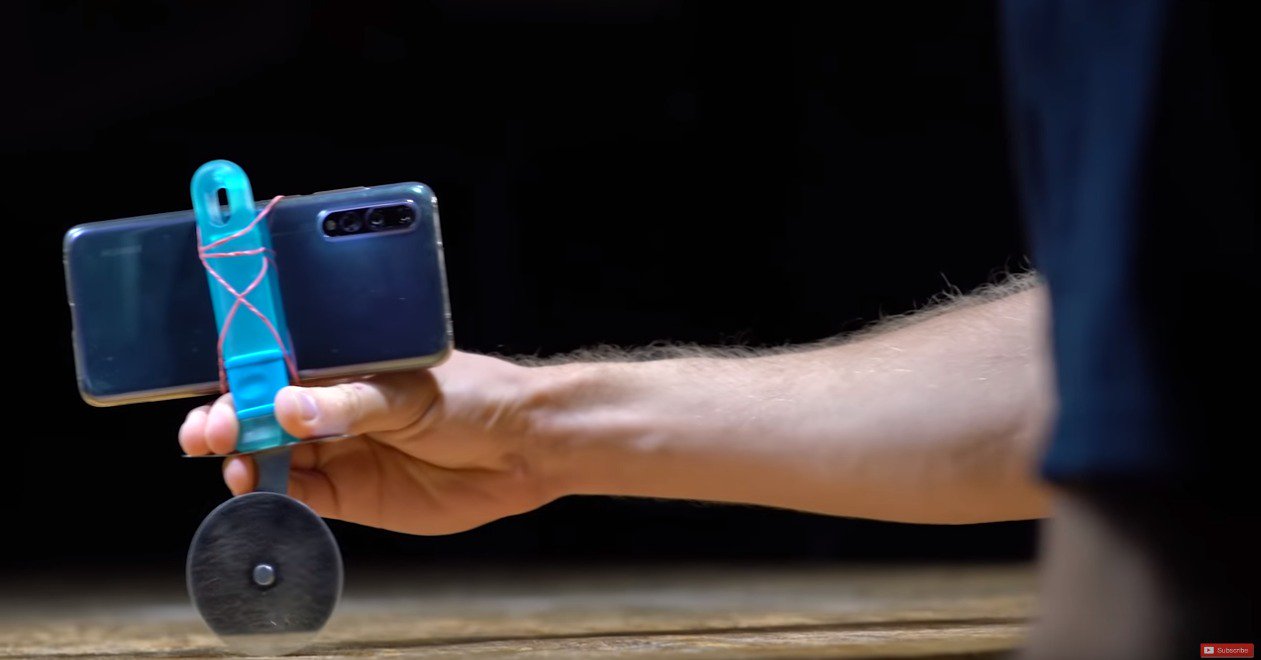
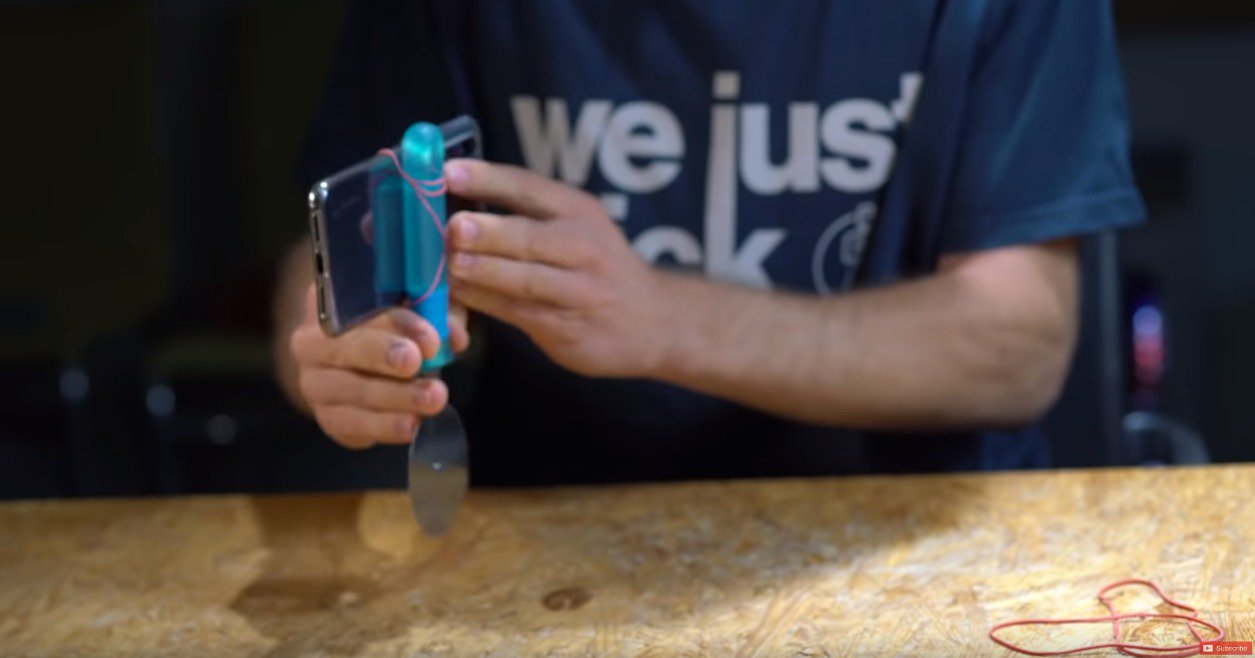
Shooting the film wants a smooth mirror and no professional equipment. In fact, the roller knife used to cut the pizza can be used. When you just use a small range of mobile phones, just attach the phone to the handlebar and move the lens horizontally.

First prepare the materials as follows: rubber bands + clean pizza cutter

Wrapped around, you can get out of the good results

Change direction has different effects


If you are interested in our articles, you can also LIKE our page:)

Want to see more related articles? CLICK ME to enter the Chinese version website.

30 funny and wierd photos that had been post on Google Street View


“I believe everyone has seen the interesting streetscapes of news or hot search because they were photographed by Google Street View. Some of the protagonists in the photos are unintentionally photographed, while others are interesting because they are in front of the street view. There are some gestures that make people laugh. Let’s see!”


Everyone should be very careful when shopping, be careful to hit the Google Street View car at any time! If you don’t pay attention, you may find yourself suddenly becoming famous and become the “landmark” of the place. Some of the photos below are classics of Google Street View. Have you seen those pictures before?

Ah… I can’t believe they are having sex in… in the public?

Well, I believe this is a girl who is looking for the car key!

Digging booger

Naked man in the trunk

Walking an alpaca…?

A child trying hard to …?

The mystery men in the desert?

Public toilet!

This man with an inflatable doll

a man pissing toward the car

Can’t understand what the lady is doing … warming-up?

The girl was laughing at her classmate at the moment of falling.

The weather seemed wonderful …

The moment of being caught

a man who puts his foot out of the window

The man is facing the world with his … um you know it

It’s good to read the newspaper in the early morning, but this…

Girl on a ride

It seems that their car is driving very fast…

Drunk man at the rear of the car?

A dog got stuck

It’s a bit scary to be stared by a dog like this

Fire car and bystander

Did you really got your clothes well-dressed …?

We are old, but we can drive too! Driving bikes…

A car stuck in the ground

Young children robbing a man

Friendly reindeer

Baby before Gucci

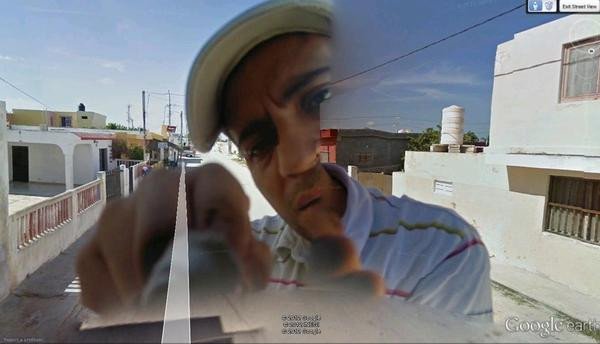
Google employees when cleaning up the photographic camera of the Street View car

Source:  Mashable

Via Unwire.hk


If you are interested in our articles, you can also LIKE our page:)

Want to see more related articles? CLICK ME to enter the Chinese version website.

Make those bold edits! And witness the miraculous God rays


“Lightroom truly is an amazing editing tool that can turn something completely unremarkable into a piece of gem. A lot of unsuccessful photos can be easily brought back to life just by applying a few filters. This article will teach everyone how to use the gradient filter function to turn an ordinary photo into one that is unique and stunning.”


Sometimes we’d finally get the chance to travel abroad, but due to various reasons such as temporary misjudgment, a lack of skill, poor lighting or a shortage of time… we end up with a series of boring and uninspiring photos. But your friends insist on you showing them your travel photos, so what should you do? Previously I’ve discussed a photo shot in Sweden, where I’ve edited it from a dark, backlit photo into a vacation photo masterpiece. Though that picture was, after all, based off what was realistically present. Today, we are going to be fierce, and come up with an edit that is “oh wow dope”, how can we approach that?

At times like this, adding some fancy god rays may be a good idea!

What are god rays?

The so-called god rays are rays of light that radiate from the sky onto your subject, but please don’t mistake it with “a ray of light that shines from the top of your head into the sky”. God rays always come down from the sky, not the other way around, so when we create the effect, it has to come from the sky. But I still must remind you, god rays are not necessary to fake effects for photos, as long as there are some clouds in the sky, any gaps that result in between the clouds will have god rays shooting out from it.

So god rays are actually rather commonplace, just hard to capture on camera. But we have Lightroom! So what can’t we do?

First, let’s look at this picture!

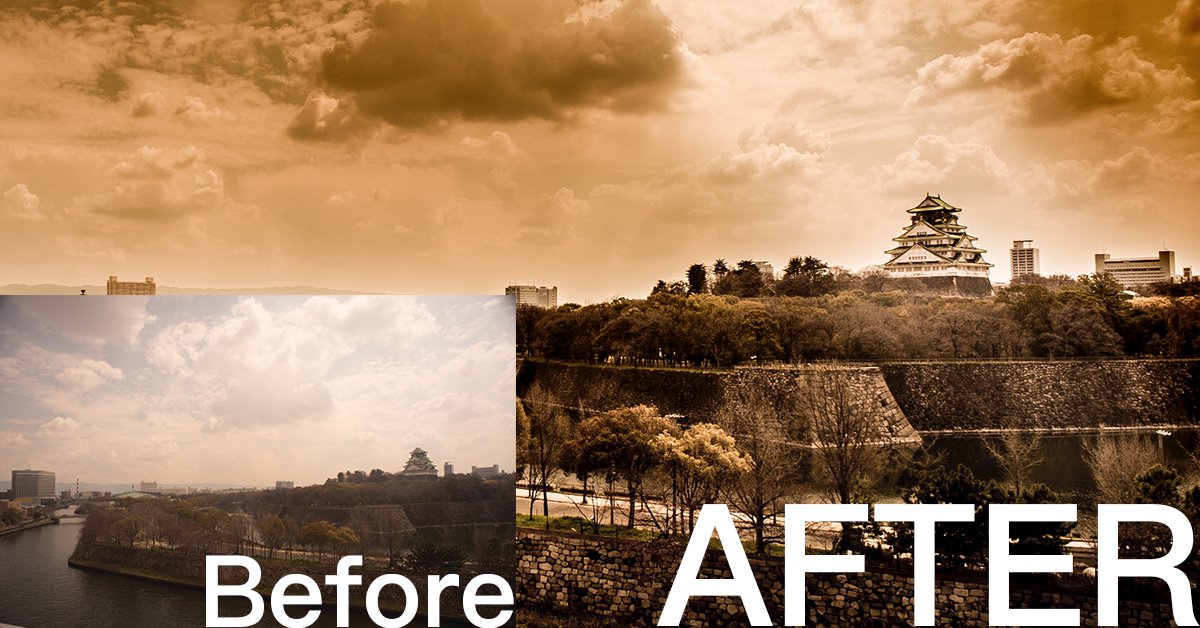
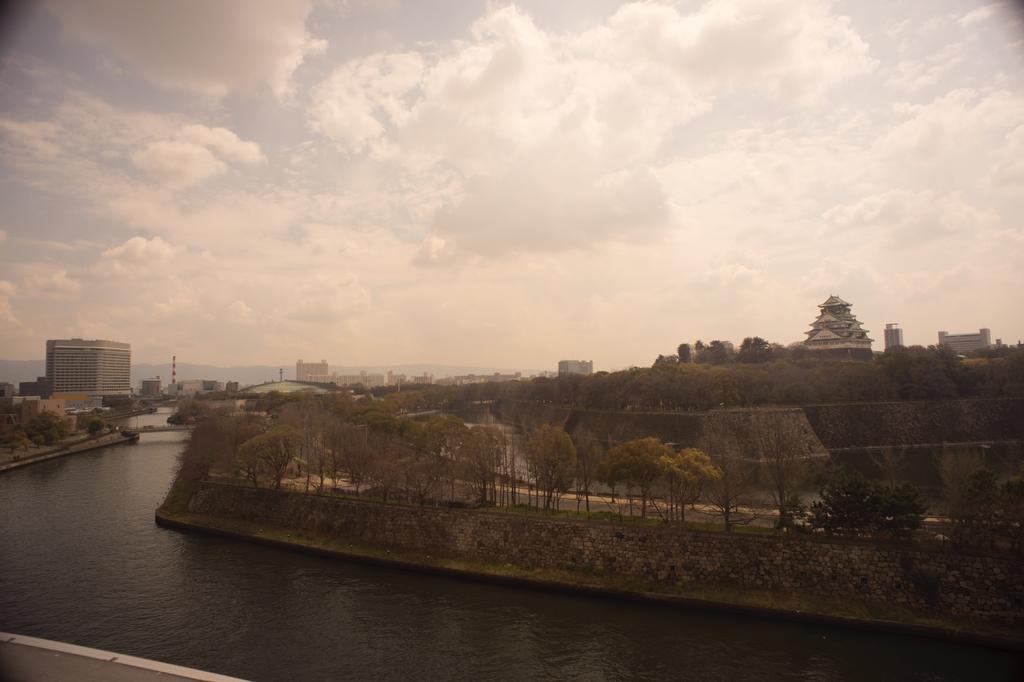
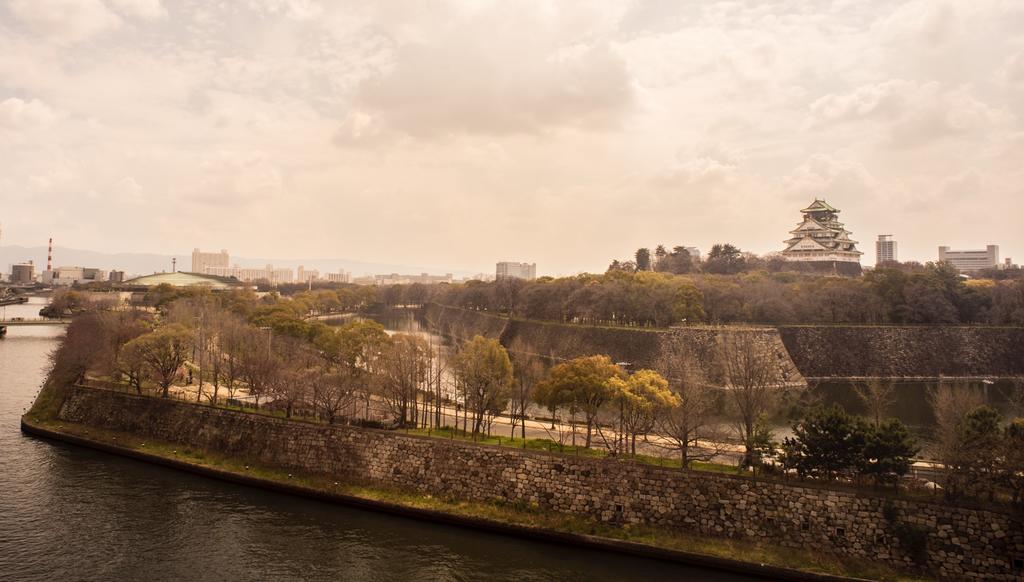
Honestly, I don’t even know why there is such a lame photo in my Lightroom library… this photo is even worse than what I would shoot with an iPhone, not to mention that the colours are weird, the sky is foggy, with severe vignetting also present. A photo like this is not very convincing for your case when telling people that you’ve been to Osaka. So we must give this picture a nice polish!

First let’s crop out everything that doesn’t belong there, such as the vignette and the buildings near the edge, and slightly adjust the composition. I’ve left the Osaka castle small here so that when the god rays shine in its presence will be emphasised, it is, therefore, unnecessary for it to be enlarged.

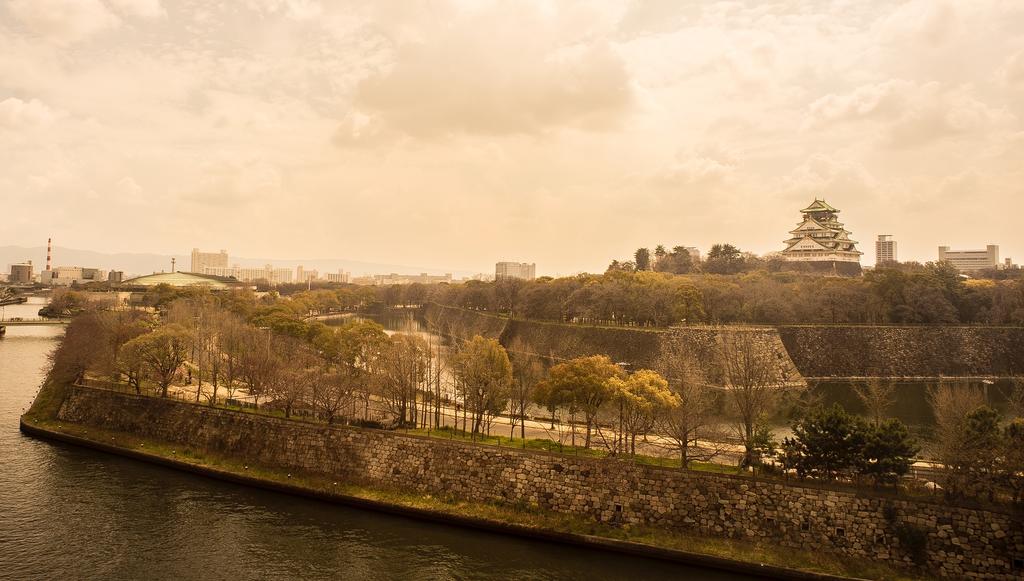
Next, we’ll fix the highlights and shadows, we’ll be using the defogging method here: decrease the highlights and the shadows. Although Lightroom also has a built-in function to get rid of the fog in photos, I’m still used to manual adjustment. I therefore directly increase the exposure of the image and decrease the value of the highlights and shadows, that way, the problem of fogginess can be solved. Additionally, another defogging method is used here: increasing the clarity, allowing the photo to look more sharp and clear.

Another reminder here that clarity and sharpness are not related. If you want to increase the details of a photo, so that the scene looks sharp, please make adjustments to the sharpness instead of clarity.

As the colour of the photo is already lame, plus I’m not sure if something got stuck that day, the colours of the photo just cannot be tweaked to look normal. Therefore, I might as well edit the photo to an old and sepia tone, I’m already trying to add an unrealistic god ray anyway, why not just edit the photo into the style of a disaster film.

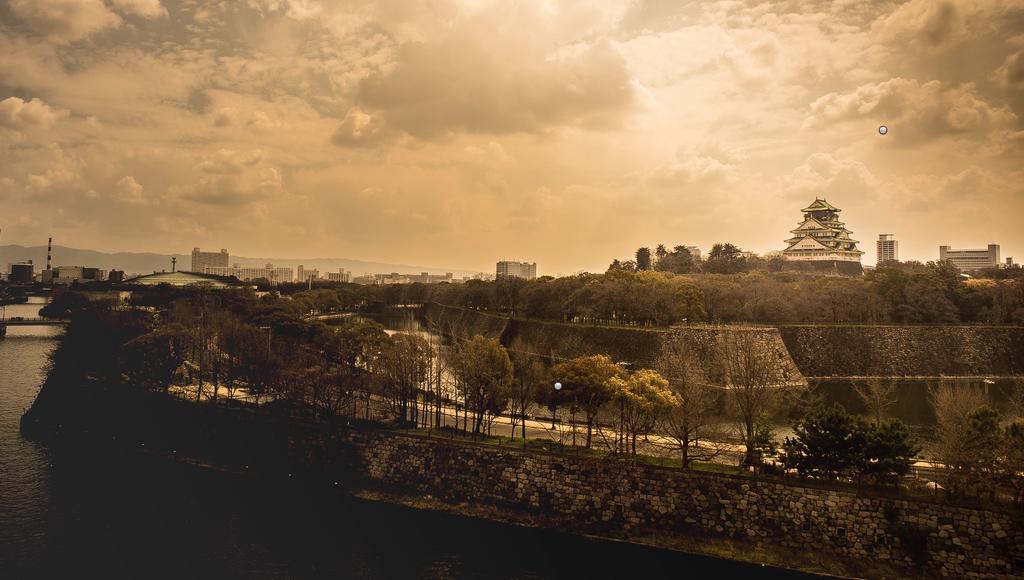
Now comes the focus of today, the god rays! Most online tutorials teach people how to create them in Photoshop, but we don’t need it to be so complicated here. Since the only subject that will be given a spotlight today with the rays is the Osaka castle, we only have to use gradient filters. First drag a filter from the bottom left corner to the top, placing the front edge of the filter to the left side of the fake ray, and trace out the line of the ray.

Then decrease the area covered by the filter, lower the highlights and increase the clarity to make the photo looks more dramatic.

After the left side is complete, all that is left is the right! Drag a gradient filter from the top right, and trace the line of the ray.

Do the same thing and lower the exposure, highlights while increasing the clarity of the filter, so that the clouds on the right half becomes equally dramatic. And now you can see a decent looking god ray shining upon the Osaka Castle! Take special note of the origins of the light here, since god rays usually come through gaps in the cloud, your ray has to radiate from in between the clouds. You can’t have the origin of the light set on a cloud, it will look very awkward as if there is a glowing cloud in the sky.

Therefore in the case of this photo, I have the light shine through the edge of the extra large piece of cloud, so that there is a feeling of the ray breaking through the sky.

Lastly, adjust the contrast and clarity of the whole photo as well as making detailed modifications to the brightness, position and linear qualities of the god ray. And you too can create a dashing, movie poster like the photo!

If you are interested in our articles, you can also LIKE our page:)

Want to see more related articles? CLICK ME to enter the Chinese version website.

Failed again? Four photo taking tips to calm your girlfriend down


“Whether you’re taking pictures for other people, or for your own girlfriend, the biggest risk is to end up with pictures with big faces, short legs, bad lighting or anything else that is unnatural and disdainful. This article will share four tips on taking pictures of people, including shooting angles and shooting poses, so that everyone can avoid the awkward picture fails in the future.”


The reason for this column’s existence must be explained before the article begins. Due to the prevalence of K-drama in the past few years, the concept of the “sweet guy” became a rather popular one. Feel free to consult Google on how the “sweet guy” is defined, but basically, in addition to having attractive appearance girls find comfortable, the sweet guy also has to perform caring and considerate deeds on every turn. For instance being an attentive listener, let the girl walk on the inside of the road and taking the initiative to hold her hand… nearly every girl wishes to be under the protection of a gentle and caring “Oppa”.

But… (the keyword But has appeared!) To be blunt, there are not so many sweet guys in the world alright? If you’re a girl, then you’d want to sooner wake up. If you’re a guy, don’t despair despite not having a handsome face. Get a grasp on a few principles, use your heart to decipher the thoughts of girls and what troubles their mind, appropriately showcase thoughtful acts and you will also be upgraded from an accessory to a sweet guy!
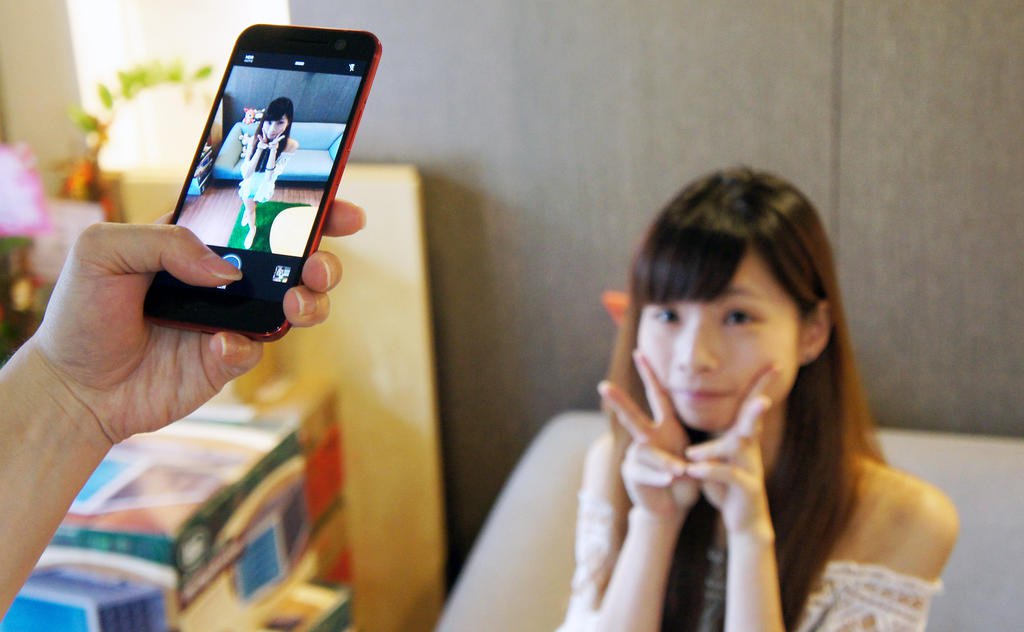
We will first approach this on the basis that every girl under the sky likes to take pictures with their phones, not only do they like to take selfies with their phones, it is even better if there’s a “sweet guy” readily available that is willing to be the photographer for them. But if his picture taking skills are lacking, then he’ll immediately fall short of being a sweet guy and be degraded to perhaps a creep. And the worst is that there may not be another chance in the future, so what would you say of the importance of picture taking skills? Especially in the present where smartphone cameras are becoming more and more advanced, for today’s example, we will be using the HTC 10, that has a well-acclaimed camera, most assuredly, taking proper photos is definitely no complicated task. Grasp these useful tips listed below, and you too will be able to take some “gorgeous” shots for her!

Properly utilise high angles, capture slender and graceful proportions of modelling standards

▲ For girls of shorter heights, it is generally desirable to capture perfect proportions through specific photography techniques. Usually shooting from a high angle from top above is a reliable method, not only can it capture a slender proportion but also a smaller, prettier face, in addition to being able to capture the overall dress sense of the shot subject

▲ As a side note, shooting from a low angle can also capture the slimming effect, but beware of the fact that gathers around the neck and chin! Besides… this picture taking pose really does tread the line between being a sweet guy and a creep, so do practice it a few times before you try it out XD


160 to 170! Everyone can be a hot chick with beautiful legs

▲ Having a pair of enviable alluring long legs must be the wish of every pretty girl in the world. And a few pictures taking tips will turn that into reality! First of all, no matter if she’s standing or sitting, remember that she is to keep her legs closed and slightly crossed. The legs will definitely look longer compared to when kept apart.

▲ As for the guy framing the picture, stick to the principle of keeping the feet around the bottom of the frame. To put it simply, try to frame the girl’s feet around the bottom edge of the photo and leave around half the space empty above her head, the visual illusion will make her legs look slightly elongated. And as an additional note, if your phone itself has a built-in wide-angle mode, the leg-stretching effect will look even better!

Grasp the natural, fleeting moments and immediately capture the elegant, literate style
▲ Girls are born to love picture taking, whether they’re walking, dining or even going to the toilet they need to take pictures. But what if you can’t think of anything to shoot, what should you do then? Let’s go the natural route! She doesn’t necessarily have to look into the camera, she can just grab a few small things from beside her and pose naturally using that, the photographer can then go ahead and capture all kinds of her natural looks!

▲ What if she still can’t open up? Then try chatting with her during shooting, or play the jester and make her laugh. In short, try to loosen the presence of the camera, and don’t forget to use the burst mode, you may just capture some right shots!


Scared of the face is too dark? Try using the HDR mode!

▲ The most important thing in photography is lighting, as long as there is enough light, even a low-resolution camera can produce decent pictures. But if you must take pictures in a low light environment, then you’ll have to rely on the HDR mode! What HDR does is that it take burst photos under the same environment and layer all the photos together in order to balance the brightness, so you won’t have to worry about taking dark-faced photos in dimmed light environments anymore!

▲The principle behind HDR is not actually important, just remember that enabling the HDR mode will greatly improve the photo’s effect if the surrounding lighting is not enough. However, sometimes if the lighting is uneven, the face will still end up being shadowed poorly. Therefore it is still recommended to take pictures in brighter environments.

Conclusion


Aside from the above-listed tips, it is also important for the camera of the phone to meet a certain standard. Especially when today’s phones easily have about ten million pixels above, with some even advertising large aperture and anti-shake mechanisms… functions that are of professional DSLR standards. The HTC 10 used in this article, for example, has functions such as the built-in panning function and optical anti-shake systems that are enough to ensure the quality of photos. In addition to that, the phone also supports wide angle shots, which can further enhance the leg-lengthening effect when taking portraits, which are all helpful in taking pretty pictures that girls will like!

If you are interested in our articles, you can also LIKE our page:)

Want to see more related articles? CLICK ME to enter the Chinese version website.

Here comes the masterlist for photography posing! Learn all at once how you can shoot modeling photos


“If you’re someone that like to have pictures ‘taken of’, or someone that likes to do portrait photography, then you must not miss this pose masterlist. This article organises a few tips used by professional models during photoshoots, and summarises six main points for everyone’s convenience.”


No one wants to see themselves looking dorky and bulgy in photos, but unfortunately, most people have no idea what to do in front of a camera. Below I have organised tips that will immediately allow you to improve on such “awkward scenarios” as soon as you understand them. Spare some five minutes, and say goodbye forever to ugly pictures!

1. Get used to cameras

In this day and age where everyone has a camera on hand, it’s no longer possible to say stuff such as “I don’t want to be in the pictures” or “I am not used to taking pictures”.


  • Point 1. Conquering your fear of cameras is something that need only be done once in a lifetime. Once you’ve overcome it, you will never be afraid again. In an era where everyone has a camera, this is a must.
  • Point 2. The key to overcoming the fear of cameras and making a breakthrough is: find “the face (the most attractive angle/expression)” for you when taking pictures of yourself through mirrors or selfies and use that same face for every other picture you will be taking from now on
  • Point 3. If your smile is unattractive, then don’t smile in pictures. No one said you have to show your gum when taking pictures, just do whatever that makes you happy
  • Point 4. Don’t clench your jaw because of anxiety! Jaw clenching will make your face look shorter and rounder
  • Point 5. If your hair covers too much of your face, you can try using an appropriate amount of hair to “shrink your face”, though covering too much of your face will make the picture look funny
  • Point 6. Try placing your hand beside your face if you feel too nervous, and imagine it is your hands everybody is looking at, then say goodbye to nervousness! (Though if your hands look like a fish cake, it probably will make you feel even more nervous than before)
  • Point 7. Go to your happy place when taking pictures, the details of your face will be altered just so slightly that you will look better in pictures

2. Try out different side angles

Taking pictures without turning to your side even a little bit will make you look “intense and vigorous” when shooting from up front, it will only leave two kinds of impressions: very dense or very angry.

Side angles include “twisting the whole body (with the shoulders as reference)” and “twisting just the head”. These are generally completely separated topics during discussions. However most of the time, side angles means turning around 45 degrees, simple.

Below is a list of examples of the suitable head angles for different subjects after assuming a side angle of 45 degrees clockwise. The head angle is set at 0 when the front of the face is in line with the front of the shoulders.

Female soft and beautiful: head turned 0 degrees

Female individualistic and enigmatic: head turned 15 degrees, chin slightly raised

Female confident: head turned 45 degrees counter-clockwise

Male confident: head turned 60 degrees counter-clockwise, chin slightly lowered

An additional note is that usually, a raised head will emit tension and aggression, while a lowered head will give a softer and easier feeling.


3. A person that doesn’t know where to place their hands will never take a good picture.

Models often only care about whether their face is beautiful or not, but a thing that is actually more important is the placement of the hands.


  • Point 1. The most difficult part is that you must understand where “the hands” need to be placed. Practice, face the mirror and practice, find your hand placement first, this way you won’t be at a loss when facing your photographer
  • Point 2. Hand poses can completely change the effect of a photo, whether you want a soft and gentle effect or a strong and fashionable look, the hand placements must be met with special attention. Even if you think a pose may feel “unnatural”, it may often be in spite of that the “most natural look in the final photo”.
  • Point 3. Modelling photos where the model looks relaxed are often shot while the model is exerting a lot of effort. Aside from rehearsing beforehand, you must check with your photographer on the scene and decide whether or not your poses are suitable

4. Kashiwagi Yuki’s posing phrase: “rock, paper, scissors”

The rock, paper, scissors hand poses phrase provides a solution to the challenge of not being able to think of hand poses. It’s more effective to show than tell, please look at the demonstration video by Kashiwagi Yuki shown below!

5. Full body shots tip: Place the centre of gravity on one leg, and control the other leg to change the mood

After preparing the face and hands as mentioned previously, what is left of the full body shot is just the bottom half of the body.

“Leg poses” are peculiar, there isn’t much to be said about it, but it can’t be just glossed over. Combinations include a mix of touching or separating the knees and touching or separating the ankles, for example:

Ankles touching + knees together gives a sweet and delicate feeling.
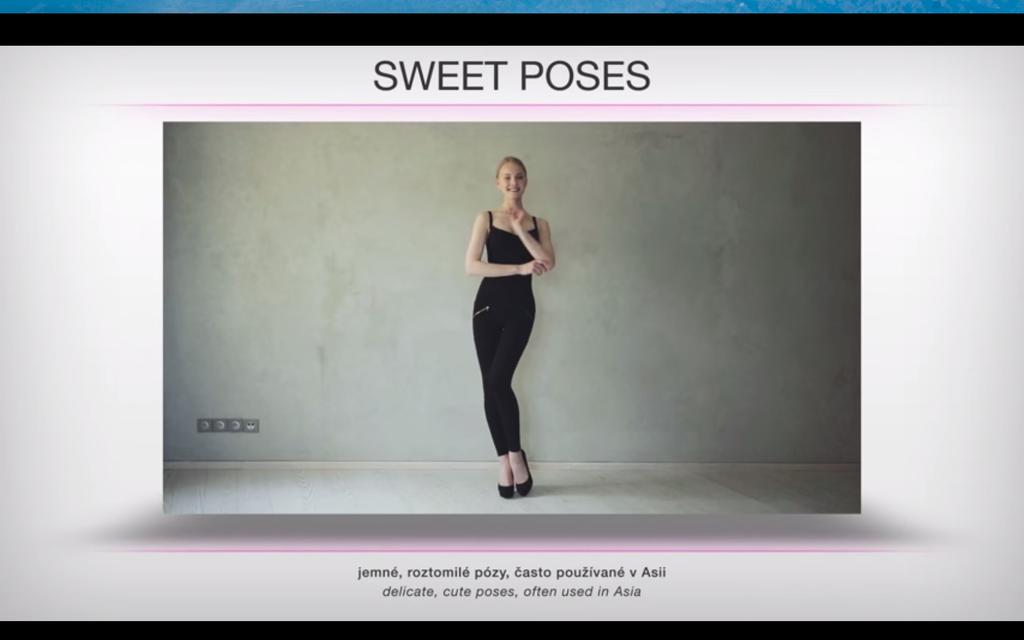

Feet pointing outwards + knees separated exudes a sense of confidence.
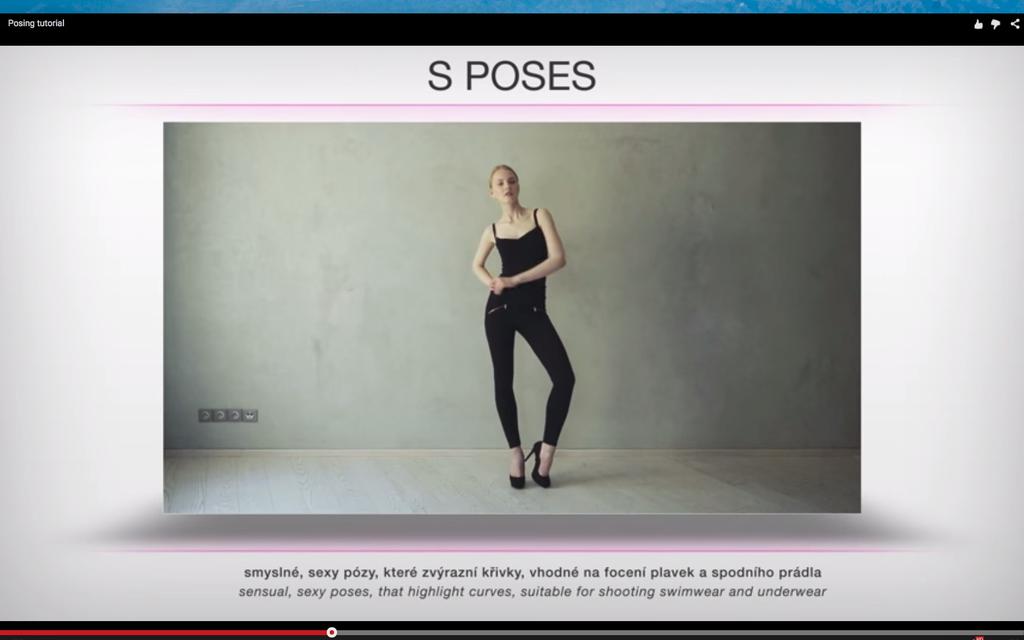
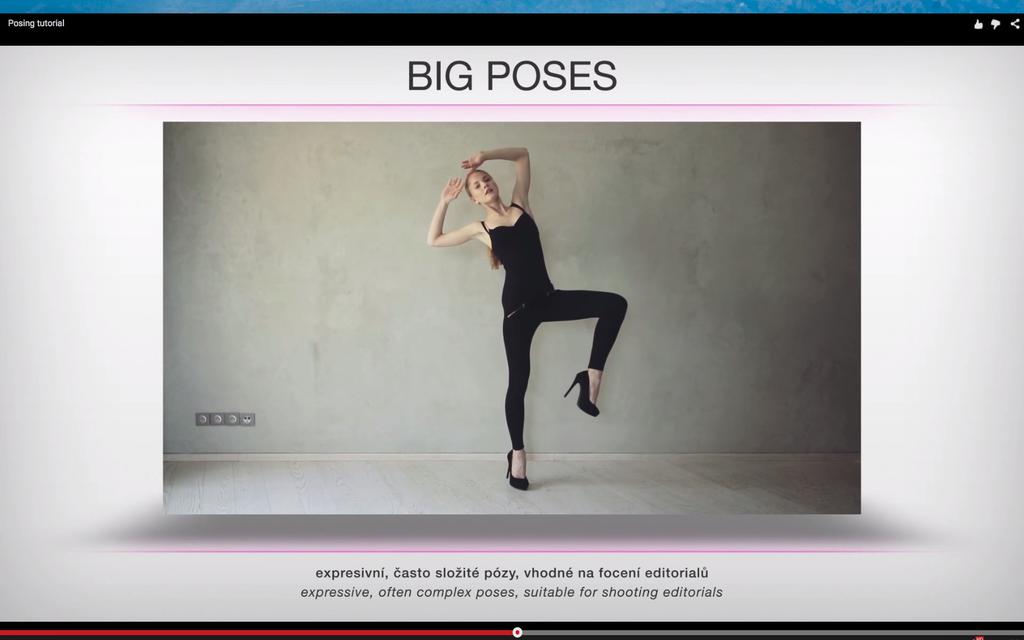
6. Everyone should have a signature Big Pose

If you want to capture the feeling of a fashion magazine in your shots, memorise the following two Big Poses and save them as your ultimate moves!

Most people are probably not familiar with those and cannot really handle a Big Pose, especially when shooting outside, it must be rather embarrassing. But the effect of Big Poses are truly amazing, so you must try them out when you’ve got the chance!

If you are interested in our articles, you can also LIKE our page:)


Want to see more related articles? CLICK ME to enter the Chinese version website.

Unable to appear photogenic? Small changes in angles will allow you to look good in photos too.


“We all know that there are special skills in positioning products for commercial photography, so of course there are also optimal poses for models during portrait photography. Not only can a good pose refine your proportions, it can also make you look more confident. This article shares the six poses suggestions for portrait photography by Jodee Ball, a photographer from Ohio, providing everyone with a guide to practice posing in front of a mirror, in order to produce better photos in the future.”


Do you also want to shoot beautiful photos? As long as you get the angles right, everything else will come naturally. American photographer Jodee Ball from Ohio gave six suggestions regarding posing, let’s explore the secrets of angles together!

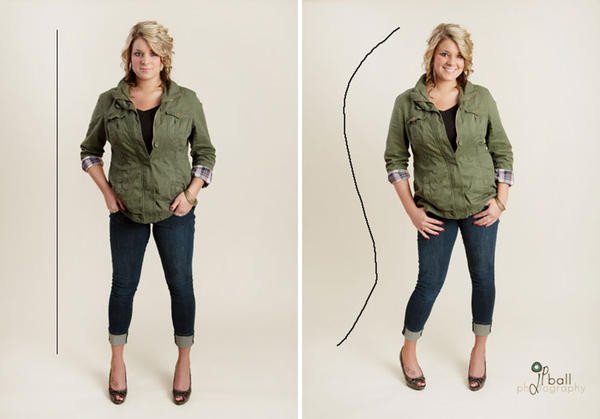
1. Find a pose where you can be the most relaxed

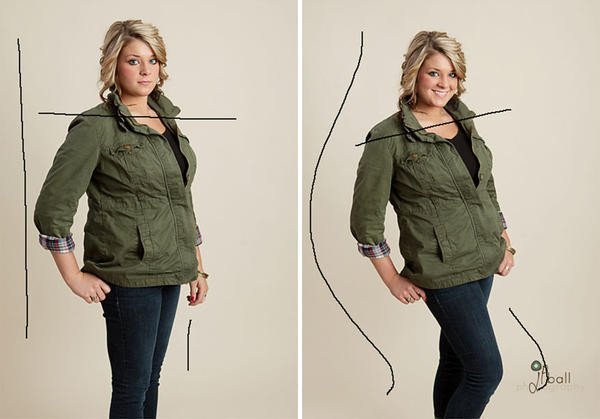
2. Twist your body so that it can be divided into three parts in the shot

3. Be aware of the poses of your hands

4. Lower your shoulders

5. Bend your knees

6. Slightly tilt your head

From the above six tips, it is obvious that it’s better for posing if your body is more relaxed and slightly tilted instead of being stiff and tense. These may also be helpful tips for selfie-taking, so those who are interested can feel free to attempt at them.

 If you are interested in our articles, you can also LIKE our page:)


Want to see more related articles? CLICK ME to enter the Chinese version website.