
Continue reading “Wanna know how to figure out your friend’s iPhone pin? Let me tell you!”

activate your mind

Continue reading “Wanna know how to figure out your friend’s iPhone pin? Let me tell you!”
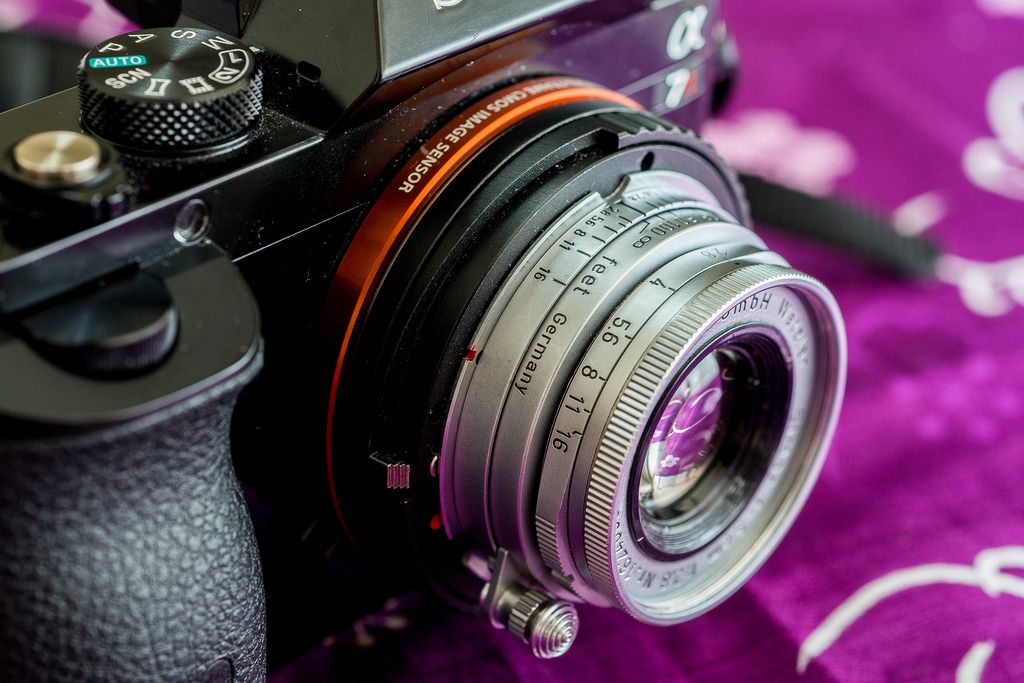
Have you ever heard of the term “interchangeable lens”? Our general understanding is that Canon should be paired with Canon, and Nikon with Nikon. Although there are aftermarket brands such as Sigma and Tamron that produce lenses for the major brands, we still have to specifically purchase lens models that are “For Canon” or “For Nikon”. Even the unstoppable German brand Zeiss has to add labels such as ZE(Canon) or ZF(Nikon) to their lens to differentiate between the different mounting mechanisms. But did you know? As long as a certain set of requirements are met, lenses from different brands can actually be used interchangeably, such as Sony using Leica lenses, Nikon using Leica lenses etc.
And these “certain set of requirements” is the important value in photography that we will be discussing today: Flange focal distance.
Why aren’t lenses for each camera interchangeable?

There are two main reasons as to why lenses are made to be used by specific brands: the lens mount and the flange focal distance are different. In the above you can see a Leica M lens mount on the left, and a Nikon SLR F lens mount on the right. The two are evidently different in their latches, diameter and mechanisms, as is their overall structure. So obviously you can’t just attach the Leica lens onto your Nikon camera, the same goes for the other way around.
However, for those who have done some research, an object called “interchangeable mount” can allow you to mount lenses from different brands onto different cameras. But is that really the case?
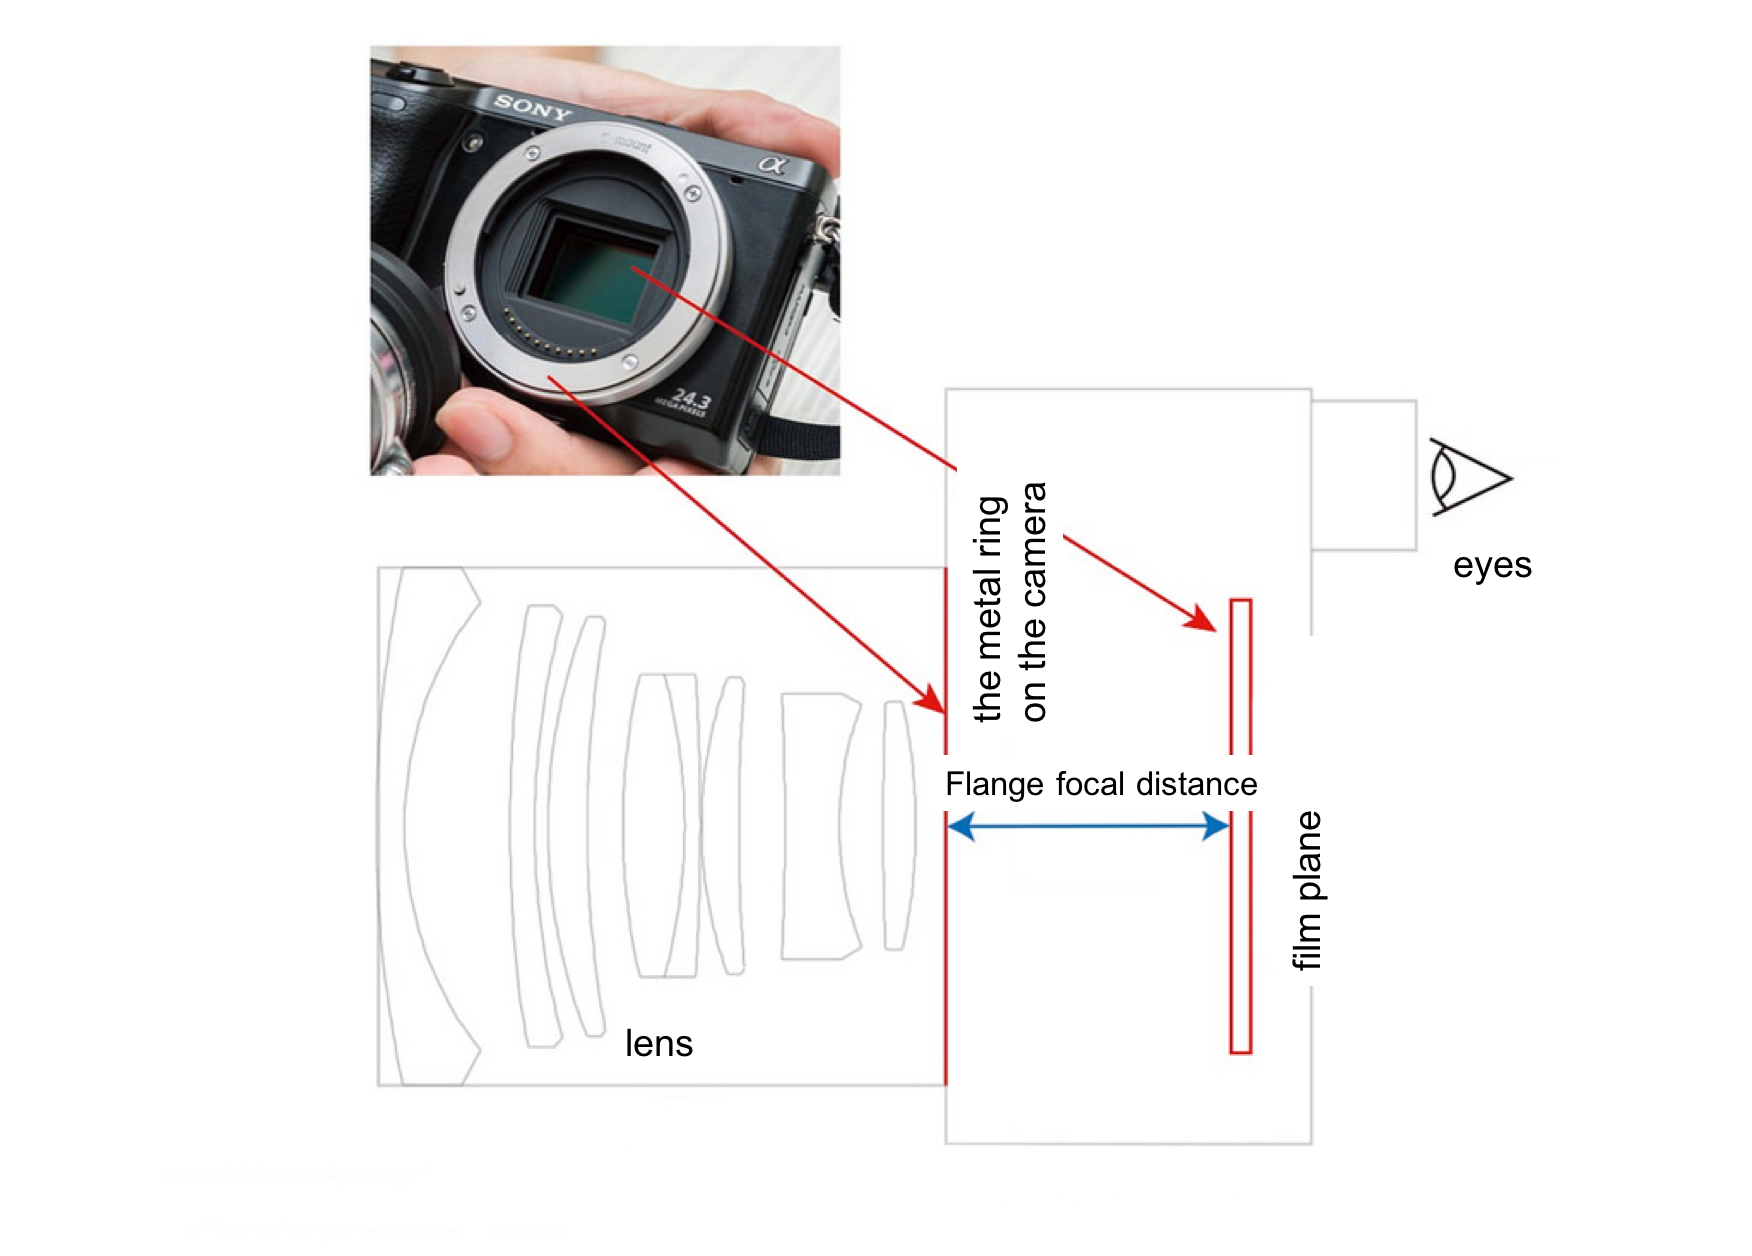 As mentioned earlier, there is another important factor to consider when deciding whether or not lenses can be interchangeable, and that is the “flange focal distance”. The so-called flange focal distance is the distance from the mounting flange(the metal ring on the camera) to the film plane, as illustrated in the image above. Each major manufacturer have a different value for their camera systems, some are relatively short like Sony and Canon, while some are longer such as Nikon and Leica R. The flange focal distance decides whether or not your lens will be able to render an image clearly in focus on film, as an incorrect distance could result in an inability to focus on infinity, inability to focus at all or inability to render a photo in its entirety(resulting in dark edges around your photo).
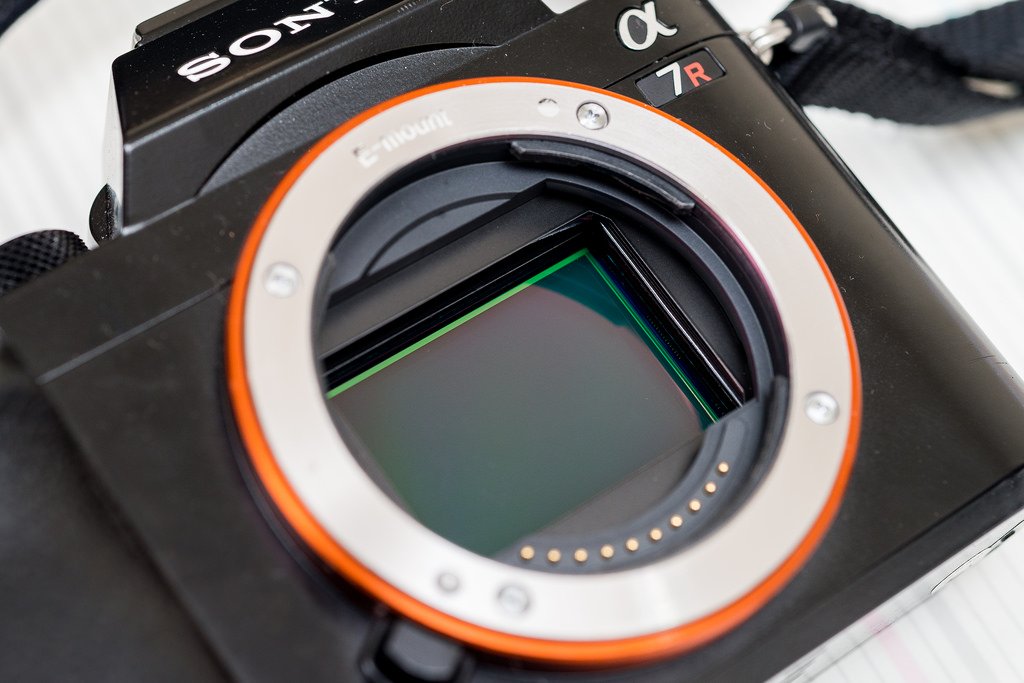
The image above shows the Sony A7R, mirrorless cameras such as this one does not require a reflex mirror, therefore its mounting flange is made to be very close to the film plane, meaning that it has a “extremely short flange focal distance”.
![]()
The above is a Nikon single-lens reflex camera with a reflex mirror, as you can see, the flange focal distance after the reflex mirror is lifted(the purple part is the film plane, and you can only see it after lifting the reflex mirror) is far larger than that of the Sony A7R. As of now, Nikon’s F-mount has the longest flange focal distance out of all mainstream single-lens reflex and mirrorless cameras, which also means it is difficult for Nikon cameras to interchange with lenses from other brands. On the other hand, Sony’s mirrorless E-mount has the shortest flange focal distance, making it possible for it to use nearly every lens on the market. Doesn’t that sound miraculous? The principle is actually very simple:
![]()
On the left of the image above you can see a Leica M lens mounted onto the interchangeable lens mount of a Sony E-mount(Sony mirrorless, including APS-C and full-frame cameras), while on the right you can see a Nikon F lens(Nikon DSLR) mounted onto the interchangeable lens mount of a Sony E-mount. Both include mounting a lens from a different brand onto an interchangeable lens mount for a Sony mirrorless camera, but the thickness of them differ drastically, can you identify the inkling?
Indeed, a lens mount not only changes the mounting flange of your Nikon lens into that of a Sony lens, it also has another vital function: to simulate the necessary flange focal distance of the designated camera brand. As you can see in the previous image, the distance required by a Nikon lens is larger than that of a Sony mirrorless camera, therefore when a Nikon lens is to be mounted on a Sony camera with an extremely short flange focal distance, the lens mount will need to compensate for the necessary distance by “simulating” it. The easiest way to do that is to thicken the lens mount so that the rear of a lens is mounted further away from the camera body.
![]()
Due to this reason, Nikon and Sony can be said to be the most extreme example of interchanging lenses. As Nikon has the longest flange focal distance, aside from Leica R who has a similar distance, lenses from other brands such as Canon and Contax can’t be used through the average lens mount; while Sony with its short flange distance can use nearly every lens on the market when paired with a suitable lens mount that increases the flange distance.
This is also why you can often see people online playfully calling Sony mirrorless cameras “Beigang XX”(Google it yourself), although such is a degrading and discriminatory term, it does emphasize the fact that Sony mirrorless cameras can use almost every lens.
![]()
Leica lenses have excellent performance and very high image quality, such that even some of their lenses produced just after world war 2 out-performs certain front-running modern day products. However, as the price tag for a Leica M camera body starts at two hundred thousand NT, not everyone can afford them (Leica lenses, however, can be bought at around ten thousand, which is a lot more affordable). Due to that reason, after the release of the Sony A7 full-frame mirrorless camera that can accommodate Leica lenses without it has to sacrifice its wide-angle focal length for APS-C sensor sizes(basically every other Sony mirrorless besides the A7 series), the A7 promptly became a must-have for numerous Leica users, who also called the product “Leica lens unleashing” cameras as it has an even better image quality and specs than an OEM Leica camera.
Note: Why does APS-C have to sacrifice wide-angle? Please see 【What you need to know before purchasing a camera: an introduction to sensor size, focal length and aperture. 】
![]()
There is another advantage to interchangeable lenses. They can save you a lot of money purchasing lenses.
Plenty of vintage lenses are much cheaper than the new lenses that are coming out, examples include Nikon’s ultra-wide angle lens and their macro lens. Even Leica has some models that are far cheaper than modern day Sony’s new Zeiss lenses, and they even have better performances. This is when interchanging with vintage lenses can not only save you money but also give you higher quality results.
However, something you should take note of is that most lenses require manual focusing once you’ve attached them to an interchangeable mount. Although companies such as Canon and Contax G have released auto-focus mount adapters specifically for Sony products, the product’s accuracy and efficiency can only be described as “unfortunate”, so you can forget about them.
![]()
After mounting an interchangeable lens, manual focusing is required, but how should be approached that?
For an SLR, there would be a light indicator for focusing, additionally, some lens mount would have chips on them and will notify you when the lens are in focus. It is all relatively easy to use, I may demonstrate that in the future when a chance arises. As for the mirrorless camera above, there are usually two options when it comes to focusing, one being “focus peaking” and the other being “magnify focus”, as can be seen in the two images below:
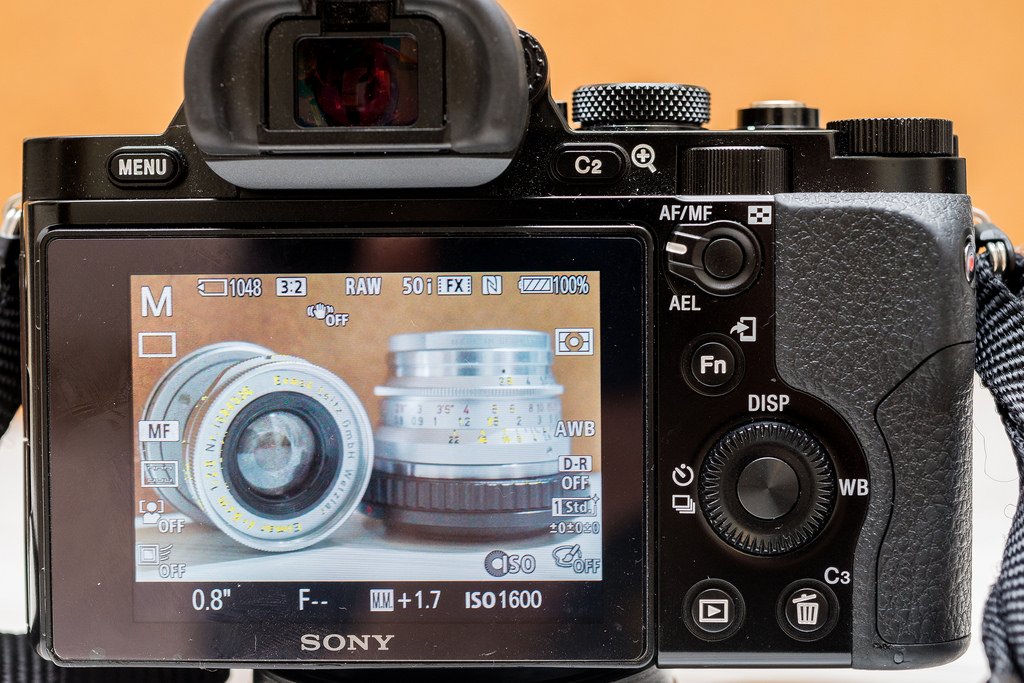
Focus Peaking
Can you see the yellow dots in the picture above? (On the fonts on the lenses) This is the peak focus displayed by the camera when it detects edges of high contrast on the objects based on the threshold setting. To put it simply, areas in focus will have colorful dots over them as an indication to you. Some cameras display the peak focus in red or other colors (Sony allows you to pick it for yourself), one can say that this is the fastest and easiest way of manual focusing with a mirrorless camera.
However, for scenes with a lower contrast or a dark environment, problems such as “unable to display peak focus” or “inaccurate focus peaking” will arise, as the function is not an all-rounded one. But if you wish for speed and efficiency, then focus peaking is the optimal solution. That being said, not every brand of mirrorless cameras include this function, so make sure to do your research and see if your mirrorless camera can use focus peaking before you buy it, or else it’d be ridiculous when it doesn’t work.
![]()
Magnify focus
Magnify focus works as its name suggests, it allows you to “manually focus” while looking into a magnified scene. This method is useful for those who specialize in still life photography, or those who are quick on their hands, and can ensure that their shot is “most definitely sharp and in focus”. Personally speaking, this focusing method is even more reliable than the camera’s auto-focus function. After all, slip-ups may still occur with the system during automatic functions, but directly magnifying the scene and manually adjusting the focus can ensure that nothing goes wrong. Unless there’s a problem with your eyesight, magnify focus is definitely the safest way for shooting still life photography!
Note: If you think what was described above is troublesome and inconvenient for traveling use, I recommend you consult this method: 【 Understand the DOF scales and hyperfocal distance, manual focus will be made simple.】
 After reading the above introduction, you must have gained a better understanding of interchangeable lenses right? By principle, as long as the flange focal distance is correct, and a mount is purchased, you will be able to freely use all kinds of different lenses! Some lenses can be directly interchanged as they have the same flange focal distance, examples include the Leica R lens in the above photo (the one on the top right) which can be directly used by a Nikon SLR just by changing the ring mount, which is super convenient. Nearly every photo you see on Cool3C taken by me is shot using this lens, the image quality is spectacular.
There are actually plenty of devices available for interchanging lenses. You need only look up your camera and lens brand online to find the matching lens mount you will need!
—
Ultra important definitions that you must read up on if you want to avoid making a fool of yourself:
The “FaLan distance” mentioned in this article is a transliteration of the English word Flange, the full term being “Flange focal distance”, referring to the distance from the “image sensor/film plane” to the mounting flange of the camera lens. It is not exactly considered an “academic” term in the study of optics but is instead just a term used by camera manufacturers for the design of camera lens mounts. This term could be easily confused with another term “Back focal length”, so do pay special attention. The mainstream translation of Back focal length in Taiwan translates to “Lens-back distance”, referring to the distance between the optical lens of the camera lens and the image sensor/film plane.
There are essentially no connections between back focal length and all the other terms in question such as the flange focal distance, mirrorless cameras, and SLRs, as it is a term directly related to the optical design of the lens itself. For instance, Zeiss’ Biogon and the series of Leica M super Angulon ultra-wide angle lenses have the problem of redshift (red shadows appearing on the edge of photos) when paired with digital cameras due to its short back focal length; Leica R’s special version Leica R Super Angulon has to alter its reflex mirror due to its short back focal length causing its reflex mirror to collide with the rear of the lens. The flange focal distance of these lenses, however, do not have any problems and can be mounted on compatible cameras and used normally, it’s just the problem with the back focal length that causes issues when shooting.
These two values get mixed up too often, so I think it’s best that I explain them. Why had I noticed this tendency? Because when this article was shared to a certain FaceBook group, I got yelled at by a senior in this field (self-proclaimed to have more than thirty years of experience with vintage lenses, someone who’s been using vintage lenses before they’re even considered vintage) with a background in optical physics, accusing me of the misuse of English translations despite being a PhD student, and even further questions my academic integrity. In the end, it was them who mixed up the terms flange focal distance and back focal length, and they thought that I had invented the saying “FaLan distance” to refer to back focal length…
So friends, the FaLan distance (Flange focal distance) and Lens-back distance (Back focal length) are completely different things! Do not mix them up. The former determines whether your lens can work and focus properly with a certain camera; while the latter affects whether or not your lens can render an image normally (the redshift mentioned previously is not a normal occurrence) or properly function at all (colliding with the reflex mirror is not normal). Both values are relevant and important to interchangeable lenses but are two completely separate concepts. Do make sure to understand them clearly before venturing into the world of vintage lenses!
If you are interested in our articles, you can also LIKE our page:)

Continue reading “Introduction to the classifications of Nikon manual focus lens”

Continue reading “Get acquainted with the perspective compression of long-focus lens”


First off, the packaging is very impressive. They definitely didn’t go cheap on the box itself. It’s very well constructed, with a very strong, thick cardboard and a superb branding that integrates Star Wars pop culture and augmented reality technology.


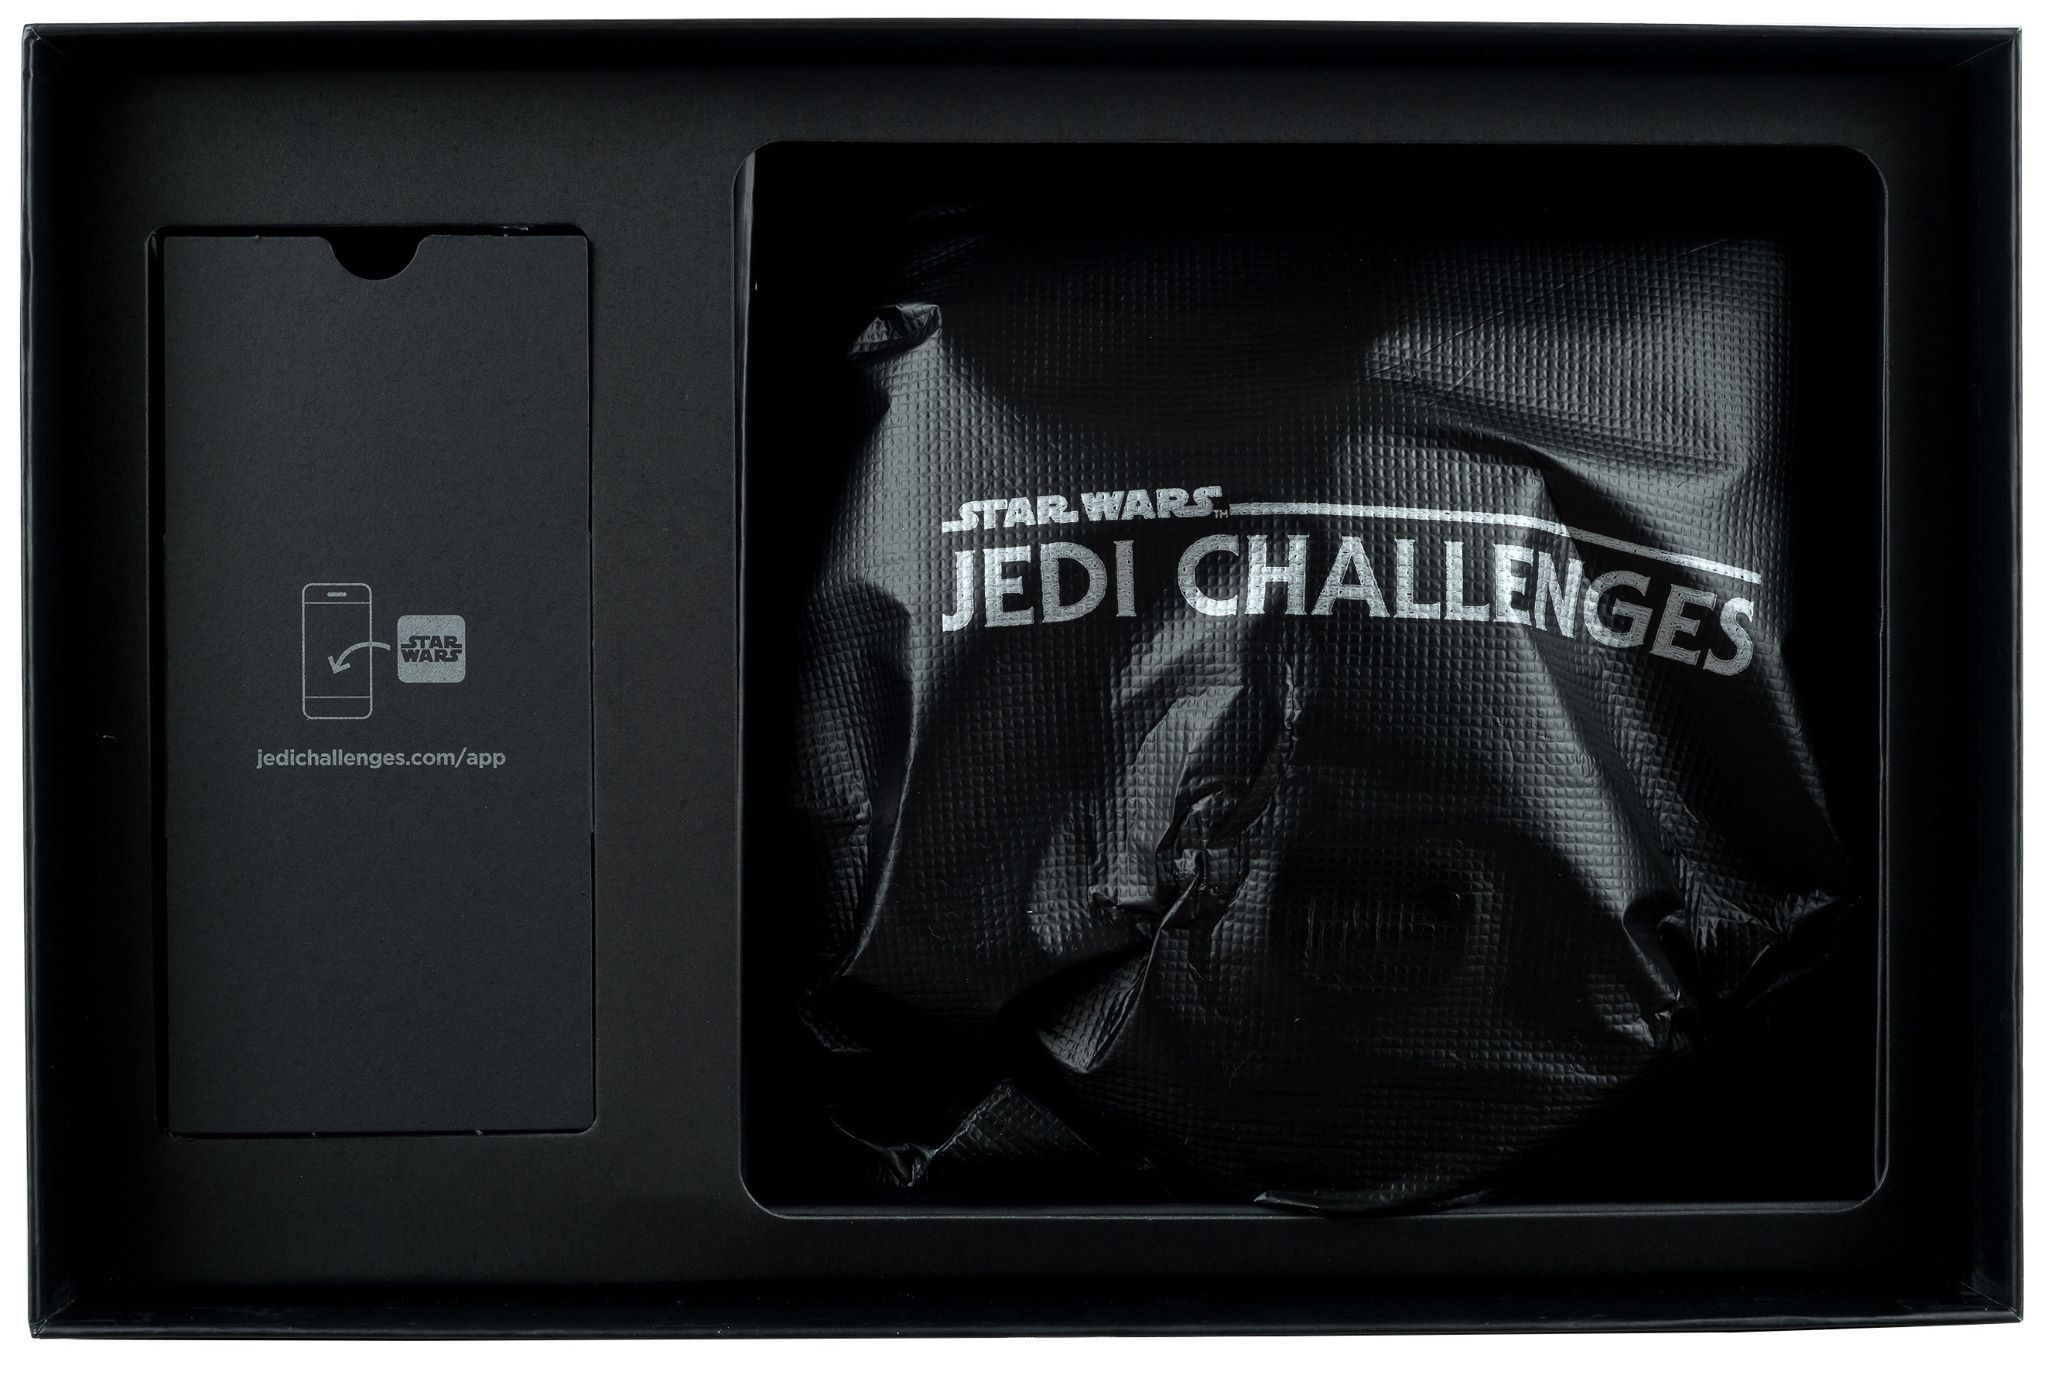
To learn more about this Star Wars: Jedi Challenges visit their Official Page. Also see what others are saying about Star Wars: Jedi Challenges at Lenovo’s Jedi Challenges Community.
If you like this video then you can subscribe the author’s channal!
If you are interested in our articles, you can also LIKE our page:)
While he may not have survived past that film, Darth Maul left a lasting impression on fans with his unique appearance and amazing lightsaber skills. And most importantly, He returns in the animated series, The Clone Wars, as well as the Disney series Star Wars Rebels.


This Statue was Inspired by Katsushika Hokusai’s traditional Japanese ukiyo-e style, the Sith warrior balances atop a rocky outcropping in a samurai-like pose. Stripped to the waist, the Zabrak wears a tattered robe that twists and flows with incredible sculpted detail. In his state of undress Maul reveals a body covered in intricate Sith tattoos, while his snarling face captures his hatred for the Jedi and the all-consuming rage in his heart. Of course, no version of Darth Maul would be complete with his blood red double-bladed lightsaber, and this one even has a special light up feature. Sculpted by Junnosuke Abe, Darth Maul stands approximately 11″. With its detailed construction and unique styling, this Sith menace is a snap-fit kit that can be put together easily in seconds without glue or modeling skill.

If you like this video then you can subscribe the author’s channal!
If you are interested in our articles, you can also LIKE our page:)

Clone Commander Wolffe (clone designation CC-3636) served in the Clone Wars as commander of the tight-knit unit known as the Wolfpack.
Continue reading “Clone Commander Wolffe”