What will be shared today are tips to adjust the tint of a photo in one click! Most wedding photos with the dreamy edit are done using this method.
Aside from this, the dreamy tint you see in some short films, MVs or commercials that look unrealistic yet beautiful… are more or less all edited through adjusting the tint.
A photo like this, if shot using a phone, can be edited with these effects using built-in filters. But if you don’t like the options given by the filters, and want to find your own style, then as long as you understand tone splitting, you will be able to perform magic on your own photos!

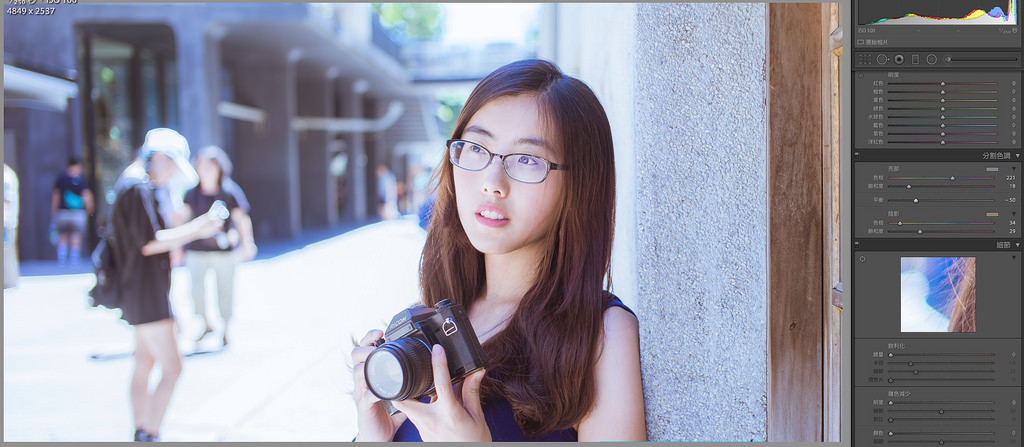
The above is a portrait I shot, when unedited, the colours just look natural and light, without any special style or atmosphere. After loading the photo in Lightroom, find “split toning” in the right-hand column, adjust the values, and observe the magic!

Split toning is divided into highlights and shadows, affecting the brighter and darker bits of the photos respectively. And according to your commands, it will change the tint!
The above image is the result of adding yellow to the brighter areas, and blue to the darker areas. Since the skin is one of the darker areas of the photo, while the ground and the sky are brighter ones, the skin appears bluer in the result.
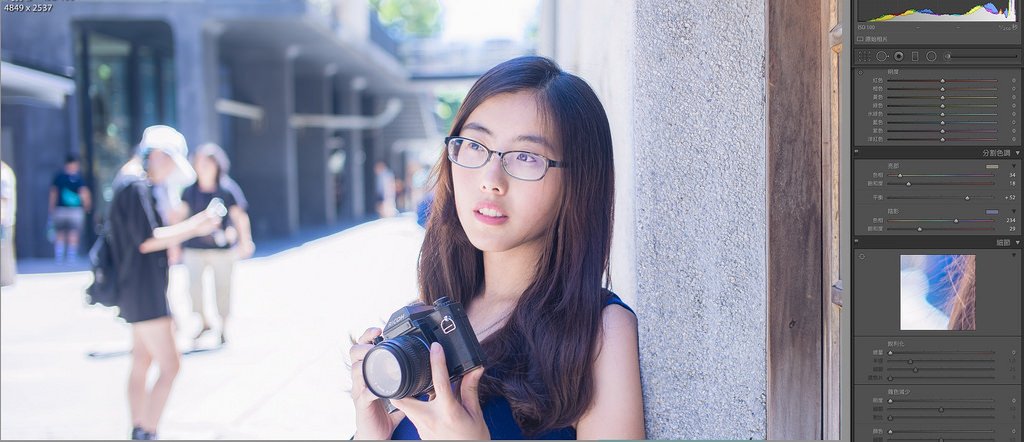
The image below is the opposite of that effect, by adding a layer of yellow onto the darker parts and the skin, while adding a layer of blue onto the buildings in the back. The result is that the face retains a very flesh-like colour, while the background becomes layered with a blue tint.

You can adjust the saturation and hue to decide the overall tint of the photo. Let’s zoom in on the photo and showcase a few examples!

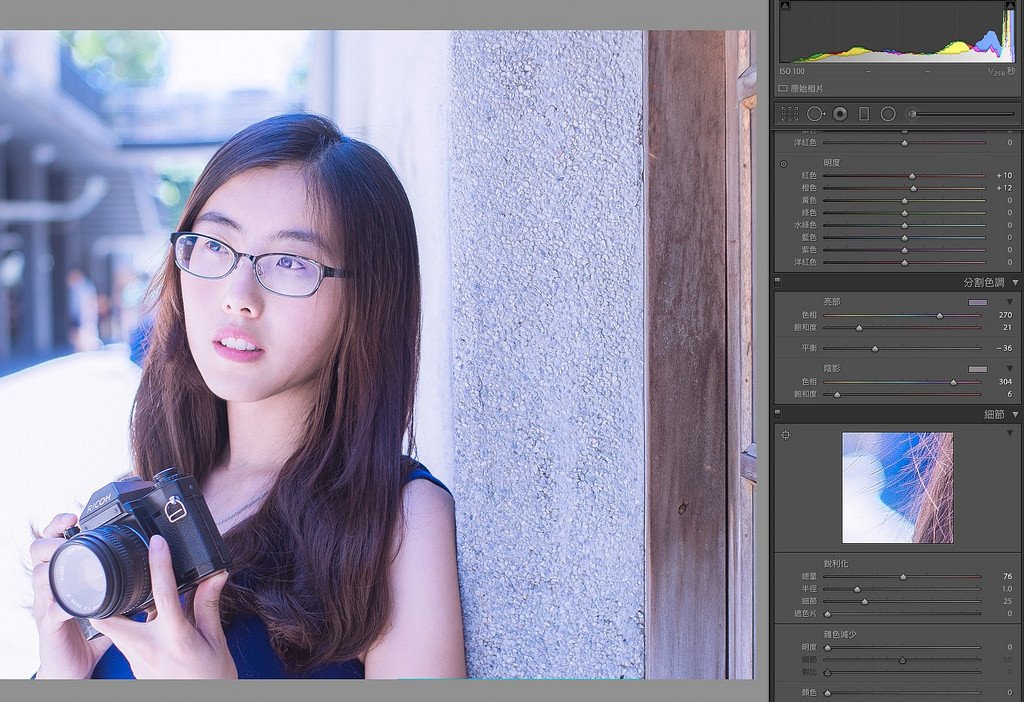
People who enjoy being a little romantic but not too extra can add a layer of blue on the highlights, and a layer of purple on the shadows. The scene will retain a light feeling, but with a soft, pink hue. A simple adjustment for you to get a romantic atmosphere, effective and subtle.

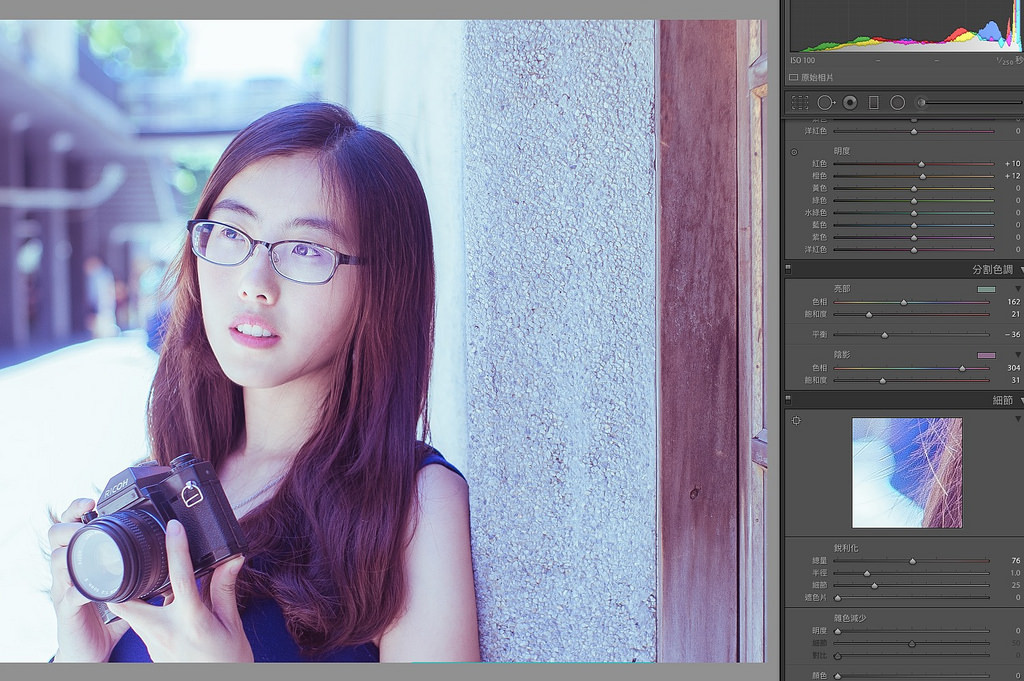
But if you’re not just interested in being a bit romantic, but instead can’t help but be very extra… then go ahead and drag “saturation” to the right!
The colour will become more saturated when you do this, therefore heavily imbuing the photo with a strong, atmospheric look. This is something very suitable for wedding or dating photos, as it can give off a sweet and loving vibe.

If you’re the more logical type, and like photos with colder colours, but not “too cold”, then adding a bit of green onto your photo can completely change the tone to a “contemplative” one.
This method of editing is very simple and fast, but once you’ve mastered it, you will be able to handle everything from the feel of the on-location weather to detailed, heartfelt emotions.

Basic colour adjustments are incredibly simple, right? I will never lie to you, editing dreamy photos is not difficult at all.
If you are interested in our articles, you can also LIKE our page:)
Want to see more related articles? CLICK ME to enter the Chinese version website.
